
Recipe (makes abt 18 lemon mochi-s)
Lemon Filling
===============
1/2 cup Sugar
1 1/2 Tablespoons cornstarch
1 1/2 Tablespoons plain flour/all-purpose flour
1 Dash Salt
3/4 cup Hot water
1 Egg yolk, slightly beaten
1/2 Teaspoons lemon rind/zest
1/4 Cup lemon Juice
1. Combine sugar, cornstarch, flour and salt; Blend in water.
2. Heat the mixture over the stove with medium High/High heat while stirring constantly.
3. Once the mixture thickens, quickly reduce the heat to low medium/medium; cook and stir until the mixture becomes a very thick paste.
4. Remove from heat.
5. Stir a small amount of the hot mixture into the egg yolk; Return to hot mixture.
6. Cook this mixture over low medium/medium heat, stirring constantly. (the thick paste will turn a nice yellow color)
7. Remove from heat.
8. Add in lemon peel and stir in the lemon juice.
9. Stir this now slightly thinned down mixture over low heat, to get back the thick consistency u had before.
10. Remove from heat, and cool for about 10 minutes.
11. Chill in the refrigerator for about 30 min to 1 hour.
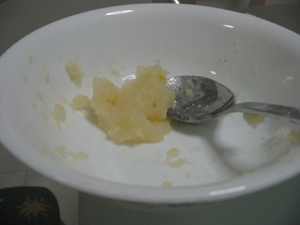
Some leftover filling.. This should be the consistency of the final product of your lemon filling.
Mochi Skin
============
1 Cup Mochiko (glutinous rice flour)
1 Cup Water
1 to 2 Dessertspoons Sugar
For Dusting katakuriko (potato starch)
1. Mix the 1st 3 ingredients in a microwave-safe bowl, and blend well.
2. Cover the mixture with a microwave-safe glass lid, leaving a small gap to release steam. Set your microwave-oven on High, and cook the mixture for 2 minutes.
3. Take out and stir the mixture very well.
4. Cover the mixture with the lid again, leaving a small gap. Set your microwave-oven on Medium high, and cook the mixture for another 2 minutes.
5. Take out and stir will.
6. Follow step 4 again.
7. Take out the mixture and stir until it turns glossy and smooth. Set aside to cool down for 5 min.
8. Line a large baking pan with aluminium foil/baking sheet. Dust the lining with katakuriko generously.
9. Transfer the cooked mochi skin from the bowl to your dusted lined pan and rest the mochi skin for another 5 minutes.
10. Dust your hands and the mochi skin well. Divide the dough into 18 pieces.
11. Take your filling out from the refrigerator. Take each portion of the mochi dough, and flatten it. (Try to make the edges thinner than the inside) Use a dessertspoon and scoop about 1/3 spoonful of filling onto the mochi skin. (You could use a teaspoon, and scoop 1 spoonful). Wrap the filling with the mochi skin by pressing and pulling the edges of the skin over the filling to the centre. Dust your mochi skin a bit more with katakuriko. Your lemon mochi is done.

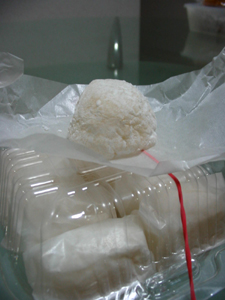
All my lemon mochis nicely wrapped..
Note: This batch of lemon mochis tastes very different from the cocoa mochi I've made earlier. It tastes like lemon meringue without the meringue (Replaced with mochi skin).. LOL... The filling's pretty sweet, so the amount of sugar is reduced for the skin. It has a little tart taste too! I like!
FOr those who have a sweet tooth (prefer sweet to sour), you can use 3/4 cups of sugar instead of the 1/2 cup to make a sweeter filling. (Will be too sweet for me though..)


7 comments :
*knock forehead*
whatt??? whattt??!?
very lemony.
Yah, coz i like lemon...
The describe the entire adventure testing the mochi, I summarized it to these few words. The order is important.
1. white mochi
2. gummy
3. chewy dough
4. SOUR
I dun think it's sour leh.. I like the tartness.. hahaha..
sour!! :D
Post a Comment