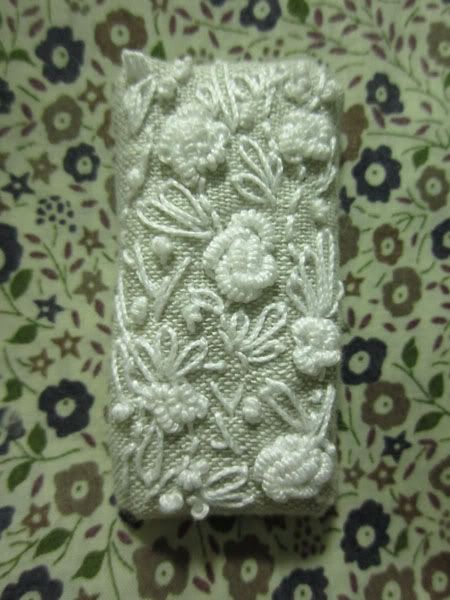
But anyhows, I believe I posted this photo in the preview.
This was a test pendant, and I had not attached a bail to it yet when I took that photo. Below is a completed version of both the test pendant (blurry in the background) and the 2nd pendant that I've made yesterday just for the tutorial.
This idea is not new as I first saw this idea in a Taiwanese embroidery book that I own. However, my embroidery design concept is quite different from the original design as I wanted a more lacy look that has been so trendy. (The design in the book is portraying a more "seashell" look although the pendants look more like pretty cookies with cream to me..)
I chose bullion roses as the base and built the design up with french knots, randomly placed backstitch trails and daisy-chain leaves.
If you are not familiar with bullion roses and daisy-chain stitches, do check out the following 2 videos!
Bullion rose + french knot tutorial
Daisy Chain stitch tutorial
Alright, to start off, we need the following materials:
1) Thick cardboard (I recycled the cardboard that came with my elastic tape)
2) Quilt batting or felt
3) Fabric - I used linen in a pale brown color
4) Thin crochet thread - I used white
5) A sharp needle for the crochet thread - preferably embroidery needle
6) All purpose "super" glue (eg. UHU, Bostik)
7) Ruler
8) Scissors (both normal and fabric)
9) Pencil/pen to draw out template on cardboard and quilt batting/felt
10) Air erasable pen (optional but good to have)
11) Double-sided fusible tape (optional but good to have)
12) Jewelry findings: Bail, chain, some kind of closure (I used a toggle clasp), jump rings/split rings, any other findings, charms etc that you need for your necklace design
First, draw out a template for your pendant on the piece of cardboard. You can use an oval shape, rounded rectangle or even a tear shape (or whatever shape you like). For my test piece, I drew a rectangle that measured 1 inch wide by 2 inches high. As for my 2nd pendant, I drew a rounded rectangle that measured 1 inch wide by 1.5 inches high. In my opinion, a rounded-off (like my rounded rectangle) shape works better than shapes with sharp corners.
We need 2 of this cardboard template. So draw out another one, and cut out both templates.
We also need to cut out 2 pieces of the quilt batting/felt using the same template.
Next cut out a piece of your fabric (I'm using linen) with a dimension that is about few inches wider and a few inches longer than your template. Using either the air-erasable pen or a pencil, trace out the template onto the center of your cut fabric.
Next, you need to plan where you want to embroider the bullion roses within the template of your fabric. These bullion roses will set up the base of your design. Do vary the sizes of the roses by using different number of wraps. You can also embroider the rose buds (french knots) at this stage.
Then, start building up your design by filling the empty spaces with daisy-chain leaves, backstitch trails and more rose buds.
Continue until you have the whole template is filled. It's also a good idea to fill up a little more beyond the perimeter of the template so that the design will look flushed to the edges. (It's looks much better this way)
Trim the edges down, leaving about 1cm around the embroidery.
Next, we need to create the core/base of the pendant. Glue the 2 pieces of cardboard and the 2 pieces of batting/felt together, making sure the cardboard pieces are at the bottom, and the batting/felt pieces are at the top.
Dab a tiny dot of glue to the reverse side of the embroidered fabric. Wrap the fabric round the cardboard+batting core like so...
..ensuring that the embroidery looks straight from the front.
Add glue to the sides of the cardboard+batting core, and flatten the edge allowances of the fabric against the sides of the core and to the back of the core like so:
If you have double-sided fusible tape, cut out a piece of fabric that's a bit larger than the pendant, and cut out enough strips of the fusible tape to cover the piece of fabric. Then lay your pendant down on the fabric and fusible tape like so:
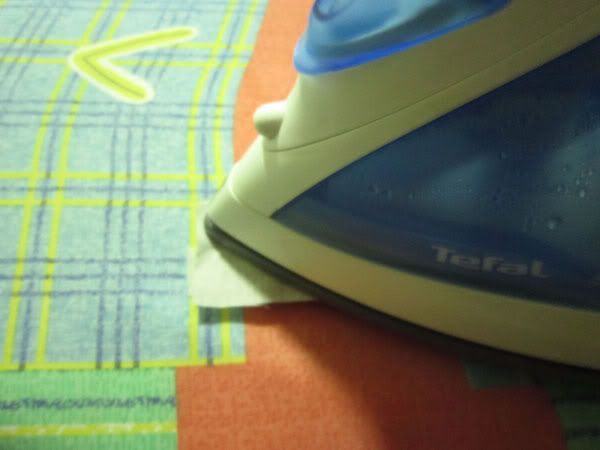
Carefully, flip them over, and iron the fabric, fusible tape and the pendant together.
Try to iron just over the area with the pendant as we only need the back fabric to adhere to the pendant (and not to the ironing board =P )
Next, trim away the excess fabric and fusible tape.
If you don't have any double-sided fusible tape, use the template to trace and cut out a piece of your fabric for the backing. Fold a few millimeters of the edges in and press flat with an iron. Apply glue on the folded edges and the center of the backing fabric, and adhere the backing fabric to the back of the pendant.
Next you need to attach the bail to the pendant. As the bail I have isn't the flat back kind which you can apply glue to, I needed to create a hole for the bail by piercing a sharp darning needle through.
This is my pendant after attaching the bail.
You can hang the pendant directly onto a chain or you can go fanciful and jazz up your necklace like what I have done!


No comments :
Post a Comment