Rhinestic's Knick Knacks
Showing posts with label Last Minute Gifts. Show all posts

Monday, December 05, 2011

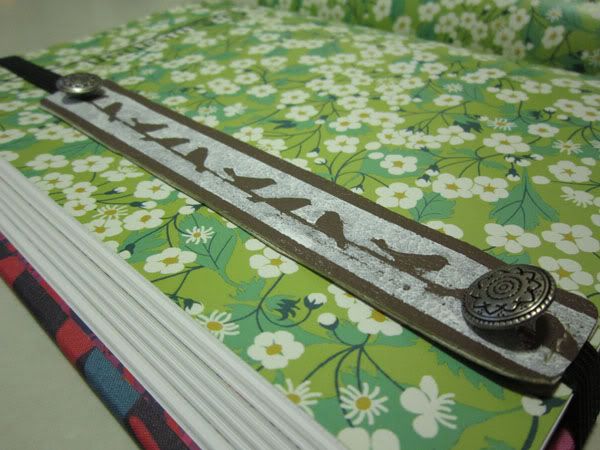
Last Minute Gifts #6 - Faux Leather Stenciled Bookmark

Here's the long awaited last tutorial!

Photobucket


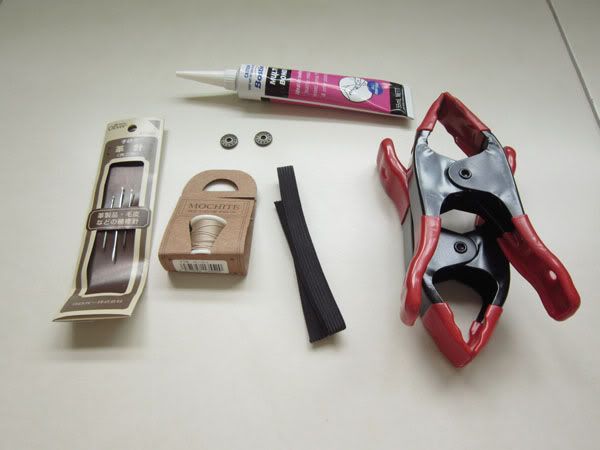
Materials needed:

Photobucket

1. Cutting mat
2. Ruler (I'm using a quilting ruler)
3. Faux Leather
4. Sharp penknife/craft knife

Photobucket

5. Punch (I'm using a border punch from Martha Stewart's line of punches)
6. Sticky tape/paper tape/painter's tape
7. A4 size printer paper (I'm recycling a used one)
8. Freezer paper
9. Paint brush
10. Acrylic paint(s)

Photobucket

11. Needle (for leather sewing if possible)
12. Thread (for leather sewing if possible)
13. Elastic tape (I'm using a 10mm wide tape)
14. Heavy duty glue (eg. UHU, Bostik, E6000 etc)
15. Clamps or clothes pins (or anything heavy to put atop 2 glued leather pieces)
16. Sharp scissors

The materials used in this project might be slightly more than my other Last Minute Gifts tutorials, but I can ensure you that this project is an easy one. Okay, let's start!

First of all, cut out 2 pieces of faux leather (each 1 in wide by 7 in long) using the penknife or craft knife. Faux leather does stretch a little, and the 2 strips might warp a little. It's okay as we can trim them down in the last few steps using a pair of sharp scissors.

Next, we need to create our stencil for our bookmark. There are many ways to do this, but since I've freezer paper and a pretty cute border punch on hand, I decided to use those. (For those who do scrap-booking, I believe there's a type of adhesive that can be used to adhere stuff temporarily. It would be a very good idea to use that with your paper stencil.)

Martha Stewart's punches do not punch well into just freezer paper alone, and it needs some sort of a stabilizer. What I did was to tape a strip of freezer paper (deep enough for my punch) to a piece of normal printer paper.

Photobucket

When punching, both pieces of paper will be within the punch with the printer paper acting as a stabilizer.

Photobucket

Start punching until it is slightly longer than 7 inches.

Photobucket

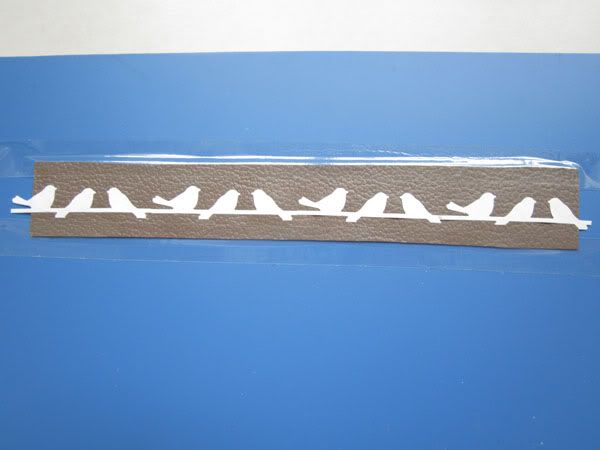
As this particular punch creates a positive cut-out of the birds and wire (instead of holes), I snipped the tail area of the birds and the ends of the wire to create a stand-alone stencil.

Photobucket

Then, place this stencil on top of one of the faux leather strips.

Photobucket

After positioning where you want the stencil to be, place a piece of cotton fabric over the stencil and faux leather, making sure not to shift anything.

Photobucket

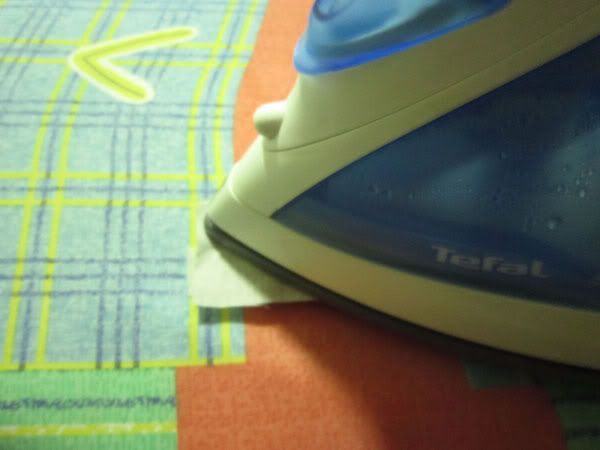
Iron with a low-heat setting to adhere the freezer paper stencil onto the faux leather.

Photobucket

Once the freezer paper stencil is properly adhered to the faux leather strip, set it aside to cool a bit on your work area. I wanted to leave the top and bottom edges of the faux leather strip unpainted, so I blocked away those edges with sticky tape.

Photobucket

Next, prepare the color(s) you are going to use to paint on the faux leather. I mixed dark purple with white to create this beautiful shade of light lilac color (please do not thin your acrylic paint with water).

Photobucket

Next, using your paint brush, apply paint onto the faux leather.

Photobucket

Once you have finished painting, let the acrylic paint dry for at least 30 minutes (or you can use a hairdryer to speed up the drying process) before removing the stencil.

Photobucket

The next step is to glue the 2 buttons onto the stenciled faux leather piece, one on each end.

Photobucket

Next, sew through the button holes to further secure the buttons to the faux leather piece. After tying a knot to secure the thread ends, snip the ends about 1/2 inch away from the knot. Apply some glue over the knot and the ends to further secure the thread (especially if you are using waxed thread meant for leather sewing).

Photobucket

Once the glue is dried, apply a layer of glue generously all over the back of the stenciled piece, and position the elastic tape like so:

Photobucket

Then place the other faux leather piece over the stenciled piece, sandwiching the elastic tape:

Photobucket

As the glue I used required some external pressure for the faux leather pieces to adhere to each other properly, I used my clamps to do the job. (Boy, was I surprised to find them at our SGD$2 store called Daiso)

Photobucket

I let them sit for about an hour or so before removing the clamps. After removing the clamps/the glue is dried, you can trim and neaten any excess warped edges. For me, I also rounded the corners.

Photobucket

The bookmark's now almost done. However, to prevent the elastic tape from having the possibility of coming undone (it happened for my test bookmark), secure the ends of the bookmark with some running stitches.

Photobucket

After finishing the running stitches in one direction, sew again in the other direction so that the gaps within the previous running stitches are covered by this set of running stitches. Once you've reached the end, ensure that the ends are at the back of the piece.

Photobucket

Tie a square knot and dab a little bit of glue on the knot. After the glue is dried, trim the ends off. And voila, the bookmark is done!

Photobucket
Photobucket

Wednesday, November 30, 2011

Last Minute Gifts #5 - Embroidered Pendant

Yay, tutorial for the embroidered pendant! I know, in the preview, I've put the faux leather bookmark before the embroidered pendant. But I ended up taking photos for the pendant tutorial first (yes, did that yesterday night) because I wanted to do that in the living room (catching my Hawaii 5 O and Bones) and the pendant project was easier to handle in a small area than the faux leather bookmark project.

But anyhows, I believe I posted this photo in the preview.

Photobucket

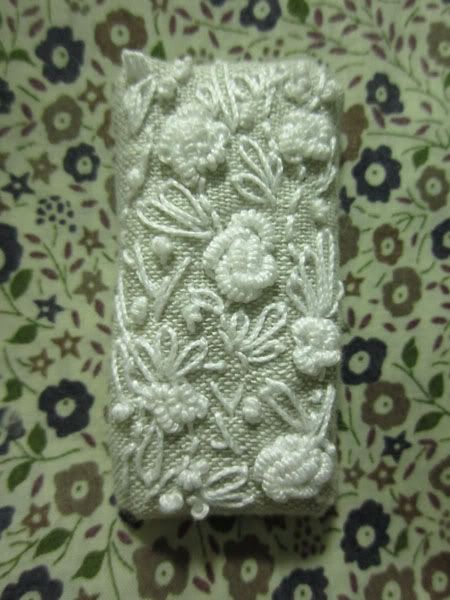
This was a test pendant, and I had not attached a bail to it yet when I took that photo. Below is a completed version of both the test pendant (blurry in the background) and the 2nd pendant that I've made yesterday just for the tutorial.

Photobucket

This idea is not new as I first saw this idea in a Taiwanese embroidery book that I own. However, my embroidery design concept is quite different from the original design as I wanted a more lacy look that has been so trendy. (The design in the book is portraying a more "seashell" look although the pendants look more like pretty cookies with cream to me..)

I chose bullion roses as the base and built the design up with french knots, randomly placed backstitch trails and daisy-chain leaves.

If you are not familiar with bullion roses and daisy-chain stitches, do check out the following 2 videos!

Bullion rose + french knot tutorial


Daisy Chain stitch tutorial


Alright, to start off, we need the following materials:

Photobucket

1) Thick cardboard (I recycled the cardboard that came with my elastic tape)
2) Quilt batting or felt
3) Fabric - I used linen in a pale brown color
4) Thin crochet thread - I used white
5) A sharp needle for the crochet thread - preferably embroidery needle
6) All purpose "super" glue (eg. UHU, Bostik)
7) Ruler
8) Scissors (both normal and fabric)
9) Pencil/pen to draw out template on cardboard and quilt batting/felt
10) Air erasable pen (optional but good to have)
11) Double-sided fusible tape (optional but good to have)
12) Jewelry findings: Bail, chain, some kind of closure (I used a toggle clasp), jump rings/split rings, any other findings, charms etc that you need for your necklace design

First, draw out a template for your pendant on the piece of cardboard. You can use an oval shape, rounded rectangle or even a tear shape (or whatever shape you like). For my test piece, I drew a rectangle that measured 1 inch wide by 2 inches high. As for my 2nd pendant, I drew a rounded rectangle that measured 1 inch wide by 1.5 inches high. In my opinion, a rounded-off (like my rounded rectangle) shape works better than shapes with sharp corners.

Photobucket


We need 2 of this cardboard template. So draw out another one, and cut out both templates.

Photobucket

We also need to cut out 2 pieces of the quilt batting/felt using the same template.

Photobucket

Next cut out a piece of your fabric (I'm using linen) with a dimension that is about few inches wider and a few inches longer than your template. Using either the air-erasable pen or a pencil, trace out the template onto the center of your cut fabric.

Photobucket

Next, you need to plan where you want to embroider the bullion roses within the template of your fabric. These bullion roses will set up the base of your design. Do vary the sizes of the roses by using different number of wraps. You can also embroider the rose buds (french knots) at this stage.

Photobucket

Then, start building up your design by filling the empty spaces with daisy-chain leaves, backstitch trails and more rose buds.

Photobucket

Continue until you have the whole template is filled. It's also a good idea to fill up a little more beyond the perimeter of the template so that the design will look flushed to the edges. (It's looks much better this way)

Photobucket

Trim the edges down, leaving about 1cm around the embroidery.

Photobucket

Next, we need to create the core/base of the pendant. Glue the 2 pieces of cardboard and the 2 pieces of batting/felt together, making sure the cardboard pieces are at the bottom, and the batting/felt pieces are at the top.

Photobucket

Dab a tiny dot of glue to the reverse side of the embroidered fabric. Wrap the fabric round the cardboard+batting core like so...

Photobucket

..ensuring that the embroidery looks straight from the front.

Add glue to the sides of the cardboard+batting core, and flatten the edge allowances of the fabric against the sides of the core and to the back of the core like so:

Photobucket

If you have double-sided fusible tape, cut out a piece of fabric that's a bit larger than the pendant, and cut out enough strips of the fusible tape to cover the piece of fabric. Then lay your pendant down on the fabric and fusible tape like so:

Photobucket

Carefully, flip them over, and iron the fabric, fusible tape and the pendant together.

Photobucket

Try to iron just over the area with the pendant as we only need the back fabric to adhere to the pendant (and not to the ironing board =P )

Photobucket

Next, trim away the excess fabric and fusible tape.

Photobucket

If you don't have any double-sided fusible tape, use the template to trace and cut out a piece of your fabric for the backing. Fold a few millimeters of the edges in and press flat with an iron. Apply glue on the folded edges and the center of the backing fabric, and adhere the backing fabric to the back of the pendant.

Next you need to attach the bail to the pendant. As the bail I have isn't the flat back kind which you can apply glue to, I needed to create a hole for the bail by piercing a sharp darning needle through.

Photobucket

This is my pendant after attaching the bail.

Photobucket

You can hang the pendant directly onto a chain or you can go fanciful and jazz up your necklace like what I have done!

Monday, November 28, 2011

Preview of last 2 tutorials for Last Minute Gifts

As November is coming to an end, so are the Last Minute Gifts tutorials. Here's a preview of what the last 2 tutorials are:

Photobucket
Stenciled faux leather bookmark

Photobucket
Embroidered pendant

Monday, November 21, 2011

Last Minute Gifts #4 - Cards holder with Pocket

Photobucket

Photobucket

Photobucket

Really useful for anyone who needs to hold all their credit cards, name cards and whatever cards in one place!

Materials needed:

Photobucket

1. Main fabric
2. Lining fabric
3. Medium weight iron-on interfacing
4. Thread and needle and/or sewing machine
5. Pins
6. Scissors (Normal and sewing)
7. Your choice of closure (eg. velcro, buttons etc)
8. Pattern (Download here)

First, print out the pdf pattern with Page Scaling set to none, and cut all the pieces out.

Photobucket


Place each pattern piece on the main fabric and trace the pattern pieces onto the fabric, marking all the dashed and dotted lines. Next, draw out a 1 cm seam allowance around all the pieces.

Photobucket

Cut out all the pieces with the 1cm seam allowance. Do the same for the lining fabric.

Photobucket

Then, trace out pattern piece A and pattern piece B on the interfacing and cut them out WITHOUT any seam allowances.

Photobucket

Iron the interfacing onto the wrong side of the main fabric pieces, making sure the dashed line and dotted line match up for piece A.

Photobucket

Next, we need to sew the lining pieces to the main fabric pieces for B and C. Place the right sides of lining piece B and main fabric piece B together and pin along the traced top. Do the same for lining piece C and main fabric piece C.

Photobucket

Hand-sew (with backstitch) or machine sew along the pinned line for B and C respectively. Fold each seam allowance down to the sides and press flat.

Photobucket

Then, fold each sewn piece in half, wrong sides together and press, making sure the seam is at the fold.

Photobucket

If you are using a sewing machine, I suggest top-stitching near the fold.

Photobucket


If you want to sew any label to the lining piece A, now is the time to do so:

Photobucket

Next, we are going to stack all the pieces together like so:

Photobucket

in this order from bottom up:
a) Lining piece A, RIGHT side facing up
b) Sewn piece B, main fabric facing up
c) Sewn piece C, main fabric facing up
d) Main fabric piece A, WRONG side facing up,
making sure the top of B is align with the top (dashed) line markings on A; and top of C is align with the bottom (dotted) line markings on A. Pin all of them together.

Photobucket

Sew along the traced edge marking on A leaving about 1.5 inch opening at the top. Trim down the seam allowance to about 0.5 cm, but keep the seam allowance at the opening as 1cm.
Tip: Use the edge of the interfacing for A as a guide when sewing.

Photobucket

Turn the piece right side out through the top opening carefully.

Photobucket

You'll get something like this (you can see the holder taking shape):

Photobucket

Iron both sides of the top flap to remove any creases and recreate the seam fold at the opening. Using blind stitches, sew the opening closed. I'd suggest pressing the holder to give it a more polished and professional look.

Photobucket

The holder's almost done and all that needs to be done is to add a closure. For me, I've sewn on 13mm plastic press studs.

Photobucket

I've also glued on a piece of lace to the top of the flap to finish the look. =)
Related Posts Plugin for WordPress, Blogger...