Rhinestic's Knick Knacks
Showing posts with label christmas. Show all posts

Friday, November 27, 2015

New Christmas Card (Etsy Update)

Hi all~!

Time flies, doesn't it? It will be Christmas in just less than a month's time!


This year, I decided to design something more cheery and in color, something to brighten up what has mostly been a grim year for humanity.

This card features Rudolph, our well-loved reindeer and a little girl whom Rudolph has met while roaming in the woods. This card also comes with multiple sentiments which you can choose to stick on your card. Feel free to create your own sentiments though!

Hop on to my shop to purchase this card!

Sunday, December 25, 2011

Christmas Decor 2011 Part 2

Hope all of you have a very blessed Christmas today!

Photobucket

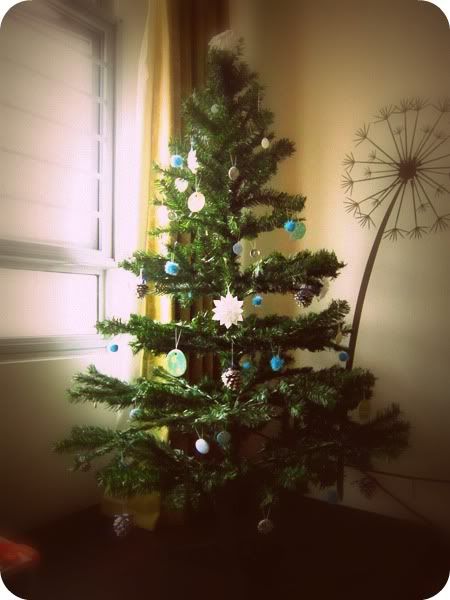
Other than the silver acorns, all the ornaments are DIY-ed! The ornaments are kinda small so the tree looks kinda sparse... Will make them bigger for next year's Christmas!

Photobucket

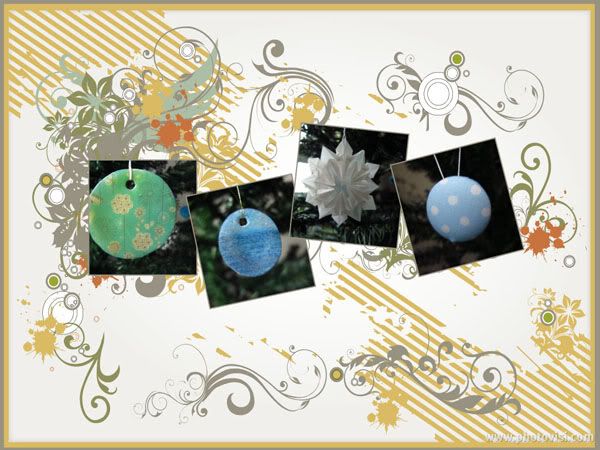
From left:
1) I cut out circles from scrapbooking papers, punched holes in them and coated them with layers of UTEE (I don't have the melting pot, so I embossed several layers).

2) Love shrink plastic! I traced out circles on pre-shrunk shrink plasic, filled in some color gradation, punched out holes and shrink them with a heat gun. I then embossed the colored side with UTEE.

3) Origami snowflake

4) Fabric covered button

=)

Thursday, December 22, 2011

Christmas Cards 2011

Nothing fancy but some simple mini cards:

Photobucket

I got myself 2 pieces of 12in x 12in scrapbooking paper (their thickness should be almost similar or slightly thinner than the thickness of a cardstock), one is in Kraft paper color and the other is in textured black. I then cut them down to 3in x 6in rectangles which when folded will be a 3in x 3in card.

The image in the center of each card was embossed with white embossing powder, using the stamp set, SM42 Lacey Patterns from Crafty Secrets. Really love the squarish lace designs!

Very simple, very quick.

Here's a birthday card using the same technique:

Photobucket

Wednesday, December 21, 2011

Christmas Decor 2011 Part 1

Okay, first:

Photobucket

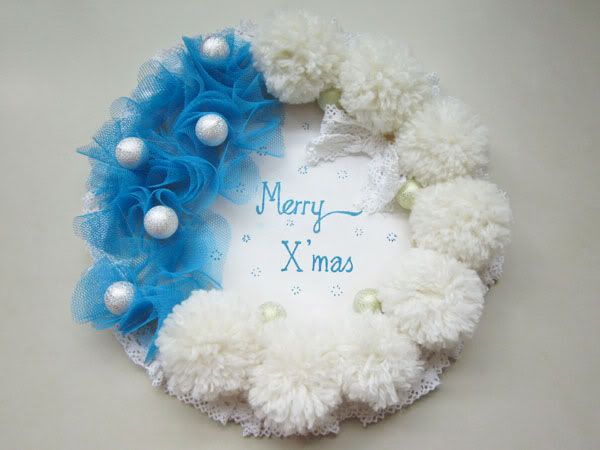
Christmas Wreath

I used this thin round wood panel which I got from Arts Friend as the base. I first painted the middle of the panel with white acrylic paint and let dry. (After hanging it up on the door, I felt that staining the wood panel with a shade similar to my wooden door would have looked better...)

Then, I got some blue tulle and following this youtube tutorial on Threadbanger, created some swirly/floral effects on a portion of the circumference of the wood panel. I made a bunch of white pom poms and filled up the rest of the circumference. After which, I glued on some silver and gold baubles over the blue tulle and in between the white pom poms. To cover any unsightly empty areas, I gathered and glued lace around the edge of the wood panel.

I then free-handed the Christmas Greeting and glued a piece of lace ribbon to fill up the center white area (which would have looked better with just stained wood paint)


And next:

Photobucket

Fun doorway decor

White poms poms again and blue tissue flower balls. I got this pre-cut and pre-folded tissue flower balls kit from our 2-dollar store (Daiso). The kit comes with 10 balls but I made only 6. If you can't find pre-cut/pre-folded ones, you can make them yourself by following this youtube tutorial. The ones I have are smaller than the ones shown in the tutorial but you can easily make the size you want by altering the size of the paper and the size of the folds. A very simple project that you can make with the young ones!

Sunday, December 05, 2010

DIY decoration for my mini X'ma tree

Got this plant from Cold Storage recently. Have no idea what this plant is but it looks like a mini X'mas tree! Got some cheap materials from Daiso to make some cute decoration for it.. ^.^


Materials:
String of blue seed beads -> circling round the "tree"
pastel color beads -> the baubles
cord with some kind of foil effect -> ribbons
crochet string -> hang the baubles and ribbons
Related Posts Plugin for WordPress, Blogger...