Rhinestic's Knick Knacks
Showing posts with label Daiso Maniac Saturday. Show all posts

Saturday, November 09, 2013

Daiso Maniac Saturday: #28 Kyohou Grapes Kanten Jelly

I am in the mood for candy today!


Kanten jelly in kyohou grapes flavor. The chewiness is somewhere between gummy and konnyaku jelly, which I love. I pretty much finished the candies up within minutes..... Ooops!

Saturday, October 26, 2013

Daiso Maniac Saturday: #27 Oyumaru Experiment Part 2 Ice Cream Waffle Clay Mold

Hey-o! I'm back with another Oyumaru experiment! This time round I tried making ice cream waffle molds from it.

So the materials I used to form the molds are:


Oyumaru of course, pair of chopsticks, a blade, metal ruler, quilting ruler and a container of boiling water. As usual, first I put the oyumaru into the hot water for a few minutes to soften it up.

Working on a piece of paper, I kinda split the oyumaru into halves and rolled each piece into a ball. I then flattened each piece with my quilting ruler.


The size of the mold will be dependent on the waffle that you want to make. I ended up flattening it to about 2 inches in diameter for the bigger mold and 1.5 inches for the mini mold.

For the bigger mold, I used the edge of my metal ruler to create perpendicular grooves on the flat oyumaru. The lines are about 5mm apart. I did let my oyumaru cool a bit before doing this step.

First horizontally... I initially used a 1.5-inch piece which turned out a little too small..

Then vertically... 

My final sizes.


I also made a smaller mold for mini waffles with another oyumaru using the reverse side of my blade.


And thought it would be useful to create a base for shaping the mini waffle...


To make the waffles, I used some Grace + Cosmo clay combo and a bit of yellow ocher acrylic paint to tint. For the bigger waffles, I split the tinted clay into 1/2 teaspoon balls.


Before using the molds, I used some baby oil to prevent the clay from sticking to them. I took a ball and pressed it into one of the big molds.


Then I covered that with another big mold, and smooshed the 2 molds together. I tried to get the edges thinner and the center thicker.


Then, I carefully peeled the clay away from the mold. And there it was! A flat waffle piece.


Since the piece was big enough, I kinda shaped it into a bowl using just my hands. For the mini ones, I did use the shaper base to help me a little. I then let dry the clay pieces for 1 day.

Drying in progress.

Ice cream waffles

And.. the mini ones. =)

Saturday, October 12, 2013

Daiso Maniac Saturday: #26 Oyumaru Experiment Part 1 Mold for UV Resin

I have always been wanting to try this experiment after reading about this interesting technique from this  Japanese UV resin book. (I know some people have pretty decent results with 2-part epoxy resin)


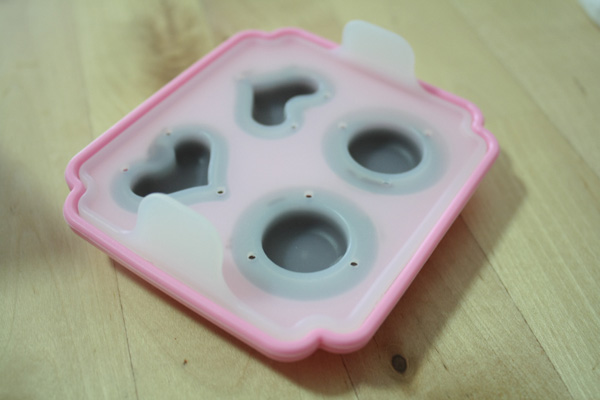
And so I got 2 packs of oyumaru from Daiso that contained the non-colored ones (but they do have glitter in them... ==).


So I took out the 2 pieces of oyumaru that I needed. I also prepared a pair of chopsticks...


And heated up some water in my microwave (the water needs to be over 80 degrees c). I dunked the oyumaru pieces into the hot water and waited for 3 minutes, while giving them a little stir with my chopsticks in between.


After 3 minutes, the oyumaru pieces softened up and I kinda rolled them into a ball..


Next, I used my quilting ruler to flatten the ball to about the size bigger and thicker than my shape that I want to mold.


Now, on the first try, I put my softened oyumaru on a clear file folder while flattening it. That's a really BAD mistake. It kinda got stuck to the folder while I was working on it and pretty soon, it became a mess. SO, tip number 1, use a piece of paper for this step.

Before pushing my shape in, I did peel the flattened oyumaru carefully (to keep its shape) from the piece of paper in case it got stuck to the paper too. Putting the flattened oyumaru back on the paper (and lightly pressing it against the paper so that it's level), I pushed my shape into the oyumaru.


I tried my best to keep the oyumaru around the corners as tight as possible. I kept the shape in the oyumaru and let it cool quite a bit, before placing it on my quilting ruler. At this stage, the oyumaru was not as sticky but it will harden to a nice shiny and level bottom due to the smoothness of the quilting ruler.

The ugly mold. My next attempt looked better, but I was in a hurry.. So no photos..

Testing time. I should have taken pictures of the piece before I domed it.. Frankly speaking, I was quite dismayed by the results. But I should have known. The book says this technique is good for making mini simple parts. Simple my shape may be, it wasn't exactly mini (3 cm on each side)... For this size and thickness, I needed about 2 minutes for each layer of resin to cure. And the process of curing kinda softened the oyumaru a bit..

Also, I have no idea if the oyumaru blocks out some UV light or there are chemicals in it which prevents proper curing, the surface touching the mold wasn't properly cured. I had to dome the piece and put it back into the UV light to cure to a shiny finish... I also had to dome the back to even out the raised edges (which is normal in using molds).

So here it is, my test piece, which I made into a ring. It's wearable, but it's way less than perfect.


I did a little more experimenting, and decided to create 2 molds out of 2 different ribbon cabochons. Both have reliefs in them (i.e. they are not flat pieces like the triangle) but one cabochon is about 3 times the size than the other.

This time round, I colored my UV resin with powdered dyes. For my first attempt, I filled the molds with resin in one pour. I thought the resin in the smaller mold will cure with no problem. And boy was I wrong.... In both molds, the resin in the recessed areas was totally not cured... ==

For my second attempt (and also tip number 2), I did layer pouring and curing. Results were better, but as with the triangle mold, the resin touching the mold surface wasn't cured properly... I had to re-cure the pieces after popping them out of the molds..

Left is my first attempt. They ended up totally flat after I re-cured them. Right is my second attempt...

Looking at the samples in the book and comparing with my own results, my conclusion is go for pieces that are (tip number 3) flat and narrow (in the book, they used a thin cross, and the outline of a pair of glasses), so UV light can hit the resin uniformly.

And as for the molds... For me, it's pretty much a one or two-time use.. To clean out the uncured resin from the mold, I had to flex the mold quite a bit. Oyumaru is kinda rigid and doesn't really retain it's shape if you deform it too much. Once you clean out the mold more than once, the mold can tear or deform. But I guess if you stick with the simple thin shapes, you might be able to churn out more usage..? Or maybe, epoxy resin works better...

For my next Daiso Maniac Saturday post, I'll be doing another oyumaru experiment! I'll try creating molds for making the base for clay waffles, ice-cream cones and sundae cups. So stay tuned!

Saturday, September 28, 2013

Daiso Maniac Saturday: #25 Strawberry Shortcake Candy

O.O Say what? Strawberry shortcake? That's already enough to convince me to get it. Hahaha!


Packaging says that the candy has 2 layers: sourish sweet strawberry flavor at the top with strawberry bits and the creamy spongecake bottom layer.

As usual, the sweets are individually wrapped.


The individual wrapper is nothing to shout about.. Let's get to the actual candy!


It's indeed 2-layered with darker pink bits at the top. But.... It tastes just like a normal strawberry and cream candy to me.... Meh?

Saturday, September 14, 2013

Daiso Maniac Saturday: #24 Curry Udon

Just because it's almost instant! (minus points on healthiness though.....)


According to the package, the curry soup contains spring onions and carrots. And instant as it is, the udon is the non-dry type.


I was a little disappointed that the curry was in the form of freeze-dried powder though. I was hoping for something more like the instant curry that I introduced in this Daiso Maniac post. Anyway, deviating from the package instructions, I tried to cook the curry udon in my microwave. I first cooked the water in my microwave at high for 3 minutes (to boil it), then placed the udon (the plastic packaging removed) in the water and microwaved it for 1.5 minutes with a lid on.


After which, I added the curry powder (and leftover beaten egg which I had from making the baked chicken katsu) and microwaved that again for another 1.5 minutes, lid on.


I got the recipe for the baked chicken katsu from Runny-san, but I didn't use any oil when roasting the panko.

Taste wise, the curry wasn't as rich as the usual udon curry sauce.  Perhaps I should have used a little less water since I wasn't cooking over the stove and the curry sauce couldn't really reduce. Not very sure if I want to try again though... Perhaps I should get a similar udon curry kit from one of our local supermarkets and compare the differences!

Saturday, August 24, 2013

Daiso Maniac Saturday: #23 Karamayo Giant Corn O.O

Come again?

Oops... Blur..

It's a packet of giant corns flavored with spicy mayonnaise.. According to the short description on the packet, the giant corns were from Peru. A quick google search led me to a forum which mentions that this type of corn is called choclo and Wiki says that choclo comes from the Andes. Interesting.


Each kernel in the packet was at least as big as my thumb! But taste wise, my tongue couldn't really pick up the karamayo and the corn's really hard.. I thought it would be crunchy like popcorn (package description says that this is a crunchy snack though....).. Heh..


Saturday, August 10, 2013

Daiso Maniac Saturday: #22 Deco Steamed Cakes Using Silicone Cupcake Molds

Remember the easy Chinese buns that I made? I used another recipe from the same cookbook for the deco steamed cakes. It's a microwave recipe and the trick is using silicone molds.

But first, I got some middle-sized silicone cupcake molds from Daiso.


The bases have the perfect size for the sample designs in the book, so there's no need to resize when I print a copy. 

The ingredients used are relatively simple:


I used Morinaga hotcake mix, raw sugar, natural yoghurt, a little melted butter and milk, an egg, a couple of Wilton food dyes, and some baking chocolate powder (I forgot to include that in the photo...!).

The first thing was to mix the ingredients (except food dyes and chocolate powder) to form the base batter. Then, I spooned out 3 small portions of the batter to make 3 different colored deco batter. For the remaining mixture, chocolate powder was added to create a brown base.


The deco batter portions were then transferred to the mini piping cornets (handmade using baking paper).


I then placed a silicone mold over the image I wanted to use. Using the deco batter as "drawing pens", I traced the image in the mold. After all the tracings were done, I microwaved the drawings for a bit to make sure they won't smudge when the base batter was poured over. (This step wasn't in the recipe, but just in case...)

After pouring the base batter to each mold (about 1/2 to 3/4 way up), I zapped them again in the microwave. As my microwave has a higher wattage, I only needed to zap once. Here was my first attempt at making microwaved steam cakes...


... Pardon the spottiness... >< This was pretty much a fail. Obviously.. So, after some head-scratching, I figured I should slowly drop a thin layer of base batter over the images first so that air bubbles will not be trapped around the drawings. 

And here's my second attempt!


This batch turned out much better! And for this second attempt, I also tried some cranberries and elderberries flavored tea in the recipe! And frankly speaking, the ones with the fruity tea tasted a bomb! Yumz!

Saturday, July 27, 2013

Daiso Maniac Saturday: #21 DIY Ice-cream Filled Chocolate Capsules!

And here's the mold!


I actually got this early this year, but for some reasons, didn't get to experiment with it until now. I first saw this mold used in this youtube video, perhaps a couple of years back, but I had never seen it sold in our local Daiso stores until I visited the then newly-opened branch at City Square mall. I managed to find something similar and quickly bought one.

Anyway, back to the mold. Here's a look at the actual mold inside.


It comes in 2 parts, this white top cover and the pink bottom mold. And so, you basically melt some chocolate first. I used this Wilton dark cocoa mint candy melts which can be melted in the microwave.


I didn't need a lot. I believe I used less than 8 pastilles..? 


And so, I melted the pastilles in my microwave for 1 min and then at 30 seconds interval until the chocolate could be stirred to a smooth texture like so.


Then, I scooped some melted chocolate and filled each cavity in the pink mold. I tapped the mold lightly on the table to level the chocolate. Instruction says to pour till the line, but there are none in the heart-shaped ones. So, I kinda eyeballed the amount.


Then, I placed the white cover on top, making sure the heart indents are aligned with the heart molds and the circular ones with the circular molds, and pushed the cover down.


Isn't this cool? The cover creates the hollows in the chocolate pieces! And guess what? I still had leftover chocolate in my mini bowl... 

Scribbles..

But not for long. =D Anyway, I let the chocolate in the mold set in the refrigerator for 40 minutes. After 40 minutes, I popped the hardened chocolate out of the mold.


Hmm.. I guess I could fill the mold a little more the next time. I had some mint ice-cream on hand, so I filled each chocolate cavity with enough ice-cream. 


I kinda let the ice-cream melt to level the liquid, and popped the plate into the freezer for about 10 minutes to refreeze the ice-cream.

And just before taking the plate of ice-cream filled chocolate halves out of the freezer, I placed a metal spoon into a cup of very hot water.


I used the back of the hot metal spoon (use a paper towel to dry the spoon first) to melt the edges of the chocolate and placed the halves together. And tadaa!!


My very own mint ice-cream filled mint chocolate capsules! What a mouthful! I think I'm going to make another batch with dyed white chocolate. (It would be nice if I could make more than 2 capsules at once for each mold..)
Related Posts Plugin for WordPress, Blogger...