Rhinestic's Knick Knacks
Showing posts with label Food. Show all posts

Monday, October 22, 2012

Ice Pops! (Even though it rained today..)

Playing around with my Zoku Ice Pops maker (the single slot version)..


The box said I can make 3 ice pops in one freezing (as in putting the ice pop maker in the freezer for at least 24 hours before using it) but I guess the weather and temps over here made it longer for each pop to freeze and I took way too long to make the layered pop, thus I only ended up with 2. Nonetheless, they looked really cool and arty!

Saturday, February 19, 2011

2nd time's not a charm but an improvement..

and I meant making macarons.

My first try was more than 1 year back and it was disastrous. What's even more maddening was it was a kit from Tokyu Hands in Tokyo, and it wasn't cheap. I only had perhaps fewer than 6 shells that survived and they all looked wonky with ugly cracks.

This time round, I bought my own ingredients separately; and researched on the method and techniques used in making macarons. I have better luck this time round. All my macaron shells survive, but quite a number have some cracks in them... Except for the 4 shells which look almost perfect:

Photobucket

I figured I might not have rested the unbaked shells long enough till the skin of the shells were dry to the touch, and my oven was a little too hot.. Oh well.. At least there's no wastage this time round, and I know which areas to improve on..

And in case you're wondering, the filling is some dark choco with mint leaves ganache... Yum ^.^

Sunday, February 13, 2011

Huat ah!

Which means 'Prosper!' in hokkien dialect. (literally, it means 'grow') This is a very common word/phrase that the Singaporean Chinese LOVE to use during Chinese New Year.

In case you're wondering, we're still within the Chinese New Year period for it lasts 15 days. Too bad that isn't translated to 15 days of holiday for us. Sigh.

Anyway, we have interesting ways to represent prosperity and one of them is a type of cake called the 'huat kueh', which means cake of growth or prosperity. This muffin-like cake rises and the top cracks open as it is steamed, thus the 'growth' process.

I made some just a while ago and it's really easy to make (the recipe can be found here! I've used the modified version instead. I would love the top of the kuehs to open up more though.. Perhaps a little baking powder would have helped!)


Tuesday, June 02, 2009

Making cakes... the lazy way..

Got this steamed cake/bread mix from Isetan supermarket last saturday after my class. Just need to add some water to the mix, mix them well, and pour into baking cups. I added some fresh blueberries too.


One bad thing about steamed cakes... They'll harden if you leave them over a couple of days.. Have to re-steam them... lol

Friday, March 27, 2009

Tangy Muffins

Fragrant and tangy muffins.. Mmmm..

Photobucket

My own recipe =P

Serving: Makes 4

Ingredients:

90g Wheat flour (sifted)
About 1/2 to 1 teaspoon baking powder
60g caster sugar
1 egg
60g butter
About 1 to 2 tablespoons milk
Mixed juice from 1/2 lemon (fresh) and 1/4 orange (fresh)*
2 teaspoons Orange zest
About 1/4 cup oatmeal

*Note I did not use all the juice... But that's the proportion I'd used..

Directions:

  1. Preheat your oven to 180 degree celsius (356 degrees Fahrenheit).
  2. Beat butter and sugar in a bowl until smooth and creamy.
  3. Beat in the egg.
  4. Pour about 1/2 to 3/4 of the lemon and orange juice mix into the butter/sugar/egg batter in (2). Mix well.
  5. Fold the flour and baking powder into the mixture in (3).
  6. Mix in milk.
  7. Fold in orange zest.
  8. Fold in the oatmeal.
  9. Pour your mixture into muffin cups, make sure to only fill about 1/2 to 3/4 of the cup.
  10. Bake in the oven for about 25 to 30 minutes, or until the muffins turn a golden color.

Saturday, February 28, 2009

Some crafts I've done...

Gifts for my cousin! (2 pendants, 1 felt cake handphone accessory, and a hand-made card!)


Something random for XB... (1 hand-made card, 4 pieces of hand-made choco..)

Saturday, January 03, 2009

Night time baking...

I don't know... It's just therapeutic..

Chewy Oatmeal Chocolate Chip Cookies

CCC
Got the recipe from here but I tweaked it a little. I reduced the portions by about half for all ingredients (Didn't want to make so many cookies), replaced the canola oil with butter, omitted the vanilla extract and added in about one or a couple tablespoons of milk. I guess you could opt not to add in the milk for a crispier version.


Lemon Squares

Lemon Squares
I pretty much followed the recipe here but halved the portion for each ingredient, omitted the vanilla extract, replaced the lemon extract with about a few teaspoons of freshly squeezed lemon juice and added in about 1 to 2 teaspoons of lemon zest. The cookies tasted yummy! (But a bit on the sweet side. If I were to make it again, I'd reduce the sugar and increase the amount of lemon juice by a little)

Friday, October 19, 2007

Soba and Medium Spicy Yakitori - Recipe

My mum didn't cook dinner today as she and my dad had a wedding dinner to attend. So I took this chance to whip up my own meal. Today's menu was soup soba and grilled chicken wings with medium hot yakitori sauce. Moving on with my recipes..!

Chicken Wings with Medium Spicy Yakitori Sauce
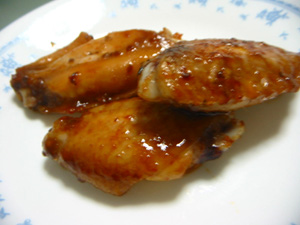


+++Ingredients+++

(For 1 or 2 persons)

3 or 4 pieces of chicken wings
3 dessertspoons of pre-packaged medium spicy yakitori sauce
2 dessertspoons of cooking sake

Directions:

1. Taw the chicken wings and poke a small hole using ur knife through each side of the chicken wings. (This is to allow the chicken to absorb the marinate; as well as to make sure the chicken is fully cooked. My tummy cannot stand unwell-cooked meat..)

2. Mix the above 3 ingredients very well in a bowl and set aside to marinate for at least 15 min.

3. Line a baking tray with aluminium foil. (For my conventional microwave oven, I need to preheat under the Grill on Low Heat setting)

4. Place the chicken wings in the lined tray and pour the marinate over the chicken.

5. Place your tray in the oven and grill it on low heat* for about 4 min*. Turn your chicken wings and grill them for another 4 min. Repeat this step. (Total cooking time is 15 to 16 min)

6. Enjoy.

*Please adjust heat and timing based on your oven specs.

Right, before I go on with the recipe for soup soba... Do you still remember Masako? The exchange student that XB's family hosted? Yup. Let me give you her recipe for cold soba first.


Cold Soba

+++Ingredients+++

(For 6 persons)

Sauce ingredients:
4 ladles of water
1 ladle of soya sauce
1 ladle of sweet rice wine
1 ladle of un-sweet rice wine
2 small packs of bonito flakes

Directions to make the sauce:

1. Place the water, soya sauce and the 2 rice wines in a pot and bring to a boil.
2. Add the bonito flakes once the mixture boils and turn the fire off.
3. Leave it till the flakes sink (approximately 5 mins)
4. Remove flakes and refrigerate.

Cooking the soba:

1. Bring a pot of water to a boil.
2. Add the soba and wait till the water boils again.
3. Bring down the flame to a slow fire for 3 mins.
4. Turn off the fire and place the noodles in cold water.
5. Wash the noodles 3 times under running water to cool them down.
6. Place the noodles in ice.

* Serve the sauce in individual bowls and noodles in individual plates.


OKAY! Now, the soup version of soba.. For the soup version, we need to reduce the ratio of the sauce ingredients to water by half. This saltiness is just right for me. If you prefer something saltier (which i advise not to... it's not very healthy...), u can increase the amounts in the brackets.


Soup Soba

++Ingredients++

(For 1 person)

For soup:

320ml water
40ml shoyu (50ml if u prefer saltier... ><)
40ml cooking sake
40ml mirin
1/2 to 1 small packet bonito flakes

For soba:

Any ingredients you like to add into the soup soba... LOL.. For mine, I have

6 thin slices of japanese fish cake
A handful of cabbage
A little Japanese mushrooms
2 cocktail sausages
1 egg
Nori to taste (Japanese seaweed)

Just boil the above (except nori) before placing them on the soba noodles.
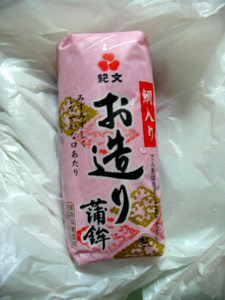

Japanese fish cake, red version


Familiar?

I've cooked mine using this sequence:
1. Boil the ingredients to be put over noodles
2. Cook the soba noodles
3. Make the soup

Directions to cook soba noodles (same as cold soba):

1. Bring a pot of water to a boil.
2. Add the soba and wait till the water boils again.
3. Bring down the flame to a slow fire for 3 mins.
4. Turn off the fire and place the noodles in cold water.
5. Wash the noodles 3 times under running water to cool them down.
6. Place the noodles in ice.

Directions to make the soup:

1. Place the water, soya sauce and sake in a pot and bring to a boil.
2. Add the bonito flakes once the mixture boils and turn the fire off.
3. Leave it till the flakes sink (approximately 5 mins)
4. Remove flakes.


To serve:

Place the cooked soba noodles in a big enough bowl. Place your boiled ingredients nicely on the noodles. Sprinkle the nori over the noodles and boiled ingredients.
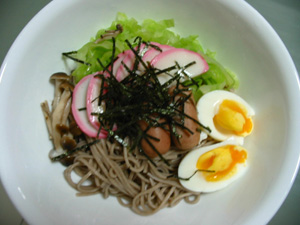

Here's how I place my stuff...

Pour the soup over the noodles and ingredients. Enjoy.
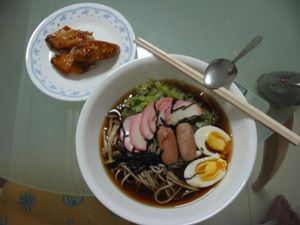

Tadaaaa!

Thursday, September 13, 2007

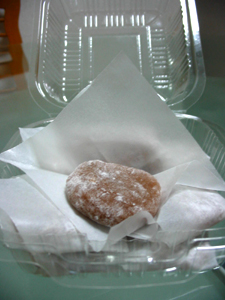
Chocolate Chips Mochi

I've made mochi before, but I find that the consistency of the cooked mochi this time round is better.. But reheating the mochi (to melt the chocolate chips) for more than 30 seconds will totally DESTROY it!!!! ARGHH... Regretted reheating it...


Chocolate Chips Mochi

Ingredients for mochi

Mochiko (glutinous rice flour) 1 Cup
Sugar less than 1/2 Cup (If your chocolate chips are very sweet, go easy on the sugar.. Unless you like very sweet stuff..)
Unsweetened Cocoa Powder 1 or 2 dessertspoons to tint the mochi
Water 1 Cup

Chocolate Chips Enough to be wrapped with your mochi skins...
Katakuriko (potato starch) Enough for dusting

Directions for making mochi

1. Mix the mochiko, sugar and unsweetened cocoa powder together.
2. Pour water to the mixture at one go as u continue mixing/stirring. Stir until the mixture is dissolved. (There might be lumps of the chocolate powder, but it's ok. This will be taken care of when u cook the mochi)
3. Wrap your bowl of dissolved mixture with saran wrap (and poke a hole on it to release steam) or cover with microwavable pyrex glass cover (do not cover completely. Leave a small gap to release steam).

IMPORTANT STEPS:
A) Set your microwave to HIGH and cook your mochi for 2 minutes. Take it out, and stir into a consistent paste.
B) Set your microwave to MEDIUM HIGH and cook your mochi for another 2 minutes. Take it out, and stir well.
C) Set your microwave to MEDIUM HIGH and cook your mochi for the last 2 minutes. Take it out, and stir very well until your mixture is a glossy, smooth paste.
D) Your mochi is done.

4. Let your mochi cool for about 5 minutes. During this time, get any large tray/pan ready and line it with aluminium foil/baking sheet (this is to make your life easier as none of the very sticky mochi will stick to your tray/pan). Dust the lining with katakuriko generously.

5. Transfer the still pretty hot mochi dough to the lined tray/pan (using a spoon or something... not your hands...). Let it cool for another 5 minutes.

6. You should be able to handle your mochi at this stage without scalding your hands. (It's still pretty warm though! Be careful!) Dust your hands with katakuriko generously. Roll the mochi into a rod shape. Divide the dough into around 15 to 20 equal parts (if you prefer smaller chocolate chips mochi, you can divide into more parts and vice versa). Take each portion, roll into a ball, and press flat. Try to make the thickness of the center thicker than the thickness of the edges. Place any amount of chocolate chips u like in the center of the flat piece, and wrap them up by pulling and pressing the edges, over the chocolate chips filling, to the center. There you have it, a chocolate chips mochi!

7. You could melt the chocolate chips in the mochi by reheating the chocolate chips mochi in the microwave on LOW for NOT more than 30 seconds. The mochi might seem flattened though... coz the insides have melted... If you prefer to have a nicely-shapped chocolate chips mochi, then I suggest Not reheating it.

Notes: The making of the mochi (the skin) is easy... It's the wrapping that's hard as the cooked mochi dough is very sticky and soft. You could tear portions of the mochi dough as u go with the wrapping. But the mochi balls might end up with different sizes. I checked my chocolate chips mochi this morning again. The mochi is slightly firmer and can retain its shape better now. Do not refrigerate your mochi!! Unless u wan hard mochi... =X

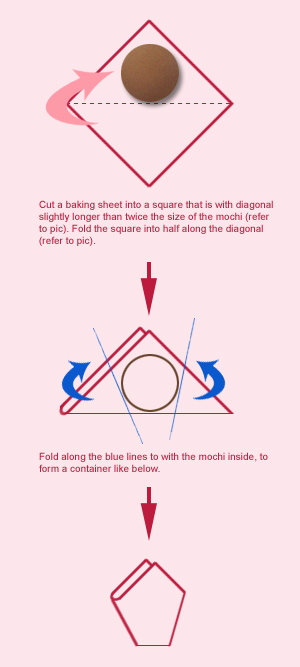
Oh, if you want to know how to wrap each individual mochi my way, follow the instructions below:


Typo: Fold along the blue lines with the mochi inside, to form a container like below...

Monday, August 27, 2007

甘すぎる ムーンケーキ。。?

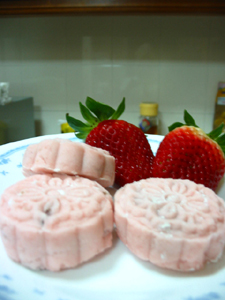
Made some snow skin moon cake today with my cousin... My mum claimed that they are too sweet for eating... But aren't snow skin moon cake supposed to be very sweet?? And according to a forum, the recipe I've chosen is already the least sweet on the net...

I've tried a few, I thought they tasted like normal snow skin moon cake.. They ARE sweet but I thought they are supposed to be that way?? I'm guessing my mum has not taken sweet stuff for so long that anything that's slightly sweeter than her normal cooking would deem too sweet for her... And considering the snow skin recipe is just pure icing sugar and gao1 fen3... It's no wonder that she'll think it's too sweet for eating... hahaha..

To think I've included a small piece of fresh strawberry in each moon cake to offset the sweetness... (small piece coz I made mini mooncakes... Thank goodness they're mini..)

Saturday, July 28, 2007

スノーボール クッキー (Snowball Cookies)

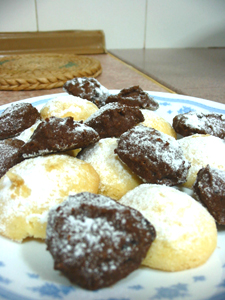
Yupz, made a batch of snowball cookies for the sake of my Japanese homework (... erm... to take photos.. that's why...) Got the recipe from a Japanese site for desserts. Can have a look if you understand Japanese(or use babel fish to translate the page... But I can't guarantee you can get an accurate translation...).


Looks yummy, isn't it? It DOES taste yummy.

Will post my rendition of the recipe soon. (Slightly different from the original recipe)

Recipe: Snowball cookies
If you follow my recipe, you'll get 10 big white snowball cookies and 20 small chocolate snowball cookies.

Ingredients:

^^For white snowballs^^

Unsalted butter ..... About 55g
Plain flour ..... About 55g
Granule sugar ..... About 25g (15g if u prefer less sweet)
Vanilla Essence ..... About 1/4 teaspoon
Freshly squeezed orange juice ..... About 4 teaspoons
Icing sugar ..... For sprinkling

^^For chocolate snowballs^^

Unsalted butter ..... About 55g
Plain flour ..... About 55g
Granule sugar ..... About 25g (15g if u prefer less sweet)
Cocoa powder ..... About 10g to 15g (depending on how chocolate-y you like)
Chocolate chips ..... About 20g (or however chocolate-y you like)
Icing sugar ..... For sprinkling

Directions:

For white snowballs ->

Preparation:
- Leave butter aside till it's soft.

1. Cream the butter.
2. Add granule sugar and mix thoroughly.
3. Add the sieved flour and mix thoroughly till you get a dough (pretty soft consistency).
4. Mix in vanilla essence and orange juice.
5. Wrap the dough in a translucent wrap or put the dough into a transparent ziplock bag. Use a rolling pin and roll the dough into a 1cm thick square or rectangle. Put the wrap/bag into the refrigerator and cool for at least 30 minutes to harden.
6. Just before taking the dough out of the wrap, preheat the oven to 170 degrees celsius.
6. Take the dough out of the wrap, and cut it into 10 equal pieces.
7. Roll each piece into a ball (or try to shape them into a slightly rounder shape if it's not easy to handle) and put them onto a lined baking tray.
8. Bake at 170 degree celsius for 20 minutes.
9. Wait for the cookies to cool down and harden before sprinkling the icing sugar over them.

For chocolate snowballs ->

Preparation:
- Sieve plain flour and cocoa powder together.
- Leave butter aside till it's soft.

1. Cream the butter.
2. Add granule sugar and mix thoroughly.
3. Add the sieved flour and cocoa powder, and mix thoroughly till you get a dough (pretty soft consistency).
4. Mix in the chocolate chips lightly.
5. Wrap the dough in a translucent wrap or put the dough into a transparent ziplock bag. Use a rolling pin and roll the dough into a 1cm thick square or rectangle. Put the wrap/bag into the refrigerator and cool for at least 30 minutes to harden.
6. Just before taking the dough out of the wrap, preheat the oven to 170 degrees celsius.
6. Take the dough out of the wrap, and cut it into 20 equal pieces.
7. Roll each piece into a ball (or try to shape them into a slightly rounder shape if it's not easy to handle) and put them onto a lined baking tray.
8. Bake at 170 degree celsius for 20 minutes.
9. Wait for the cookies to cool down and harden before sprinkling the icing sugar over them.

Enjoy!

Note: If you prefer your cookies less sweet, you can opt out the icing sugar (which would not make your cookies look like snowballs though...) or reduce the granule sugar slightly.

Tuesday, February 13, 2007

1 thing at a time....

Okay... Remember I said I've some photos to show? Lets start from SHE's qing gong... Held on 28th Jan, Sunday, at Junction 8.


As you can see... the photo is very blur... But.. I think you all can make out who's who.. Starting from the extreme left, our Dear Mr. DJ, Ding Zhiyong... then Hebe, Selina and Ella...


More blurry photos... I couldn't get a decent solo photo of Selina at all.. Then again, I got these solo photos by accident.. I wanted to snap a photo of them together...


Next, is the Hana Kimi xuan chuan on the next day... Look.. I don't have any decent photos at all... What I have here is a really pathetic video clip that I've taken.... which I think is so-so... At least can see them, okay?!??!


Ok.. Next up... My mum bought some Jap sweets from the Chinese New Year goodies exhibition at Ngee Ann City..


Guess what's inside! Nice-looking box, isn't it?


Tadaahh! Yummy-lookin' okashi!


A little closer look at the okashi... Very colorful, aren't they?


A close-up! Very, very, very delicious looking, aren't they?? Truth is.. Some of them are way too sweet for my liking.. hehe..


Right.... What's next.. Oh yah.. Some craftworks I've done... Since Chinese New Year is coming, I made a really huge looking ball-shaped lantern out of ang pows (or red packets in which we put $$$ in...)


It looks kinda small here... But it is actually pretty huge... Bigger than a soccer ball..


A clearer shot (for XZZ... That's the golden sticker... See it?)


I also did a beaded handphone critter... Doll, I mean.. The doll set actually came together with the bead book I bought... Din really fancy the white color as the skin tone... looked too ghostly for me..


Yah, that's the one which the pink arrow is pointing to... Ghostly...


Oh.. I also bought some japanese cookies from Daiso... They are more yummy than the japanese okashi that Mum bought.. Less sweet..


The cool paper bag is bought from Daiso too.. Going to send some of those candies to Julienne and Jeanne!


That's about all... Will have some more craftworks completed in the near future.. (I hope.. As what I've said in my previous post.. Had not been able to work too late into the nights coz of flu and what not.. Partly, it's due to the zzz-effect that the anti-itch pills have on me..)

Wednesday, November 23, 2005

Resurrection of my blog...

This blog has been idling for... I don't know... Years?? Actually, I've totally forgotten that I've registered for a Blogger blog until reading some crafters' blogs recently. All thanks to these crafters, I'm now totally inspired to continue doing my blog...

As of now, I'm using Blogger's blog template. Hoping to find one on the net that suits my personality... (Too lazy to create one.... Hehehhe... *roll eyes*)


Meeting up with XZZ

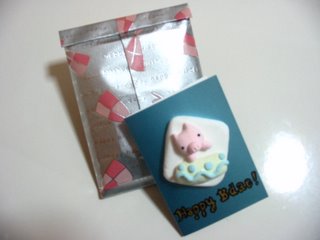
Will be meeting up with XZZ later at Holland Village. Made a birthday card consisting of a cute little emblem made from a type of air drying, ultra light soft clay (also termed as Angel clay?). Will upload some pictures of the card later when I get home... (Photos still in my cam..)


~~Angel Clay~~

Had a fun time meddling with Angel Clay. It's very light and soft, and non sticky to the hands. But the clay did get very dry at one point when I was modelling it. Had to constantly add water to it to get the kneading going... And creases still appeared when the clay dried! =='''


Healthy chocolate cookie cakes?!

Also made a supposedly healthy chocolate cake and some chocolate cookies yesterday night... Guess what... I used the wrong kind of flour for the cookies... I had just used the self-raising flour for the cake and I happily continued using that for the cookies as well... Now I've cookies with the texture of cakes... == Oddly, one of my colleagues liked it... Haha..


Keeping Warm

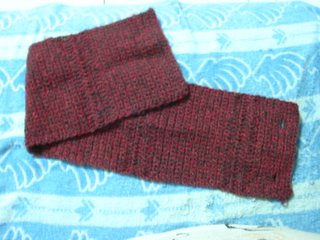
Currently crocheting a scarf for my friend studying in Russia... I've bought 2 skeins of yarn some time back, and I'm running out of it... Guess I need to "refill" my inventory...


The actual color of the scarf is less red than this.......


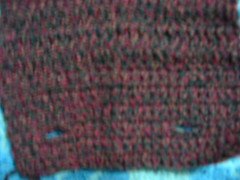
See the button holes?


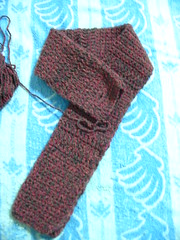
Actual scarf pattern (Not complete)~ A button will be sewn on one side, and a crocheted flower (which I haven't done...) will be attached with the button hole...


Now I'm really at a loss as to what to make of this thing...


Lookin' very rolled up..
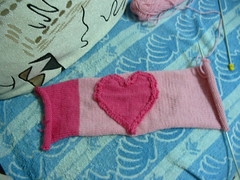
An incomplete scarf like thingy with a heart shape on it... I'm new to knitting (yes... STILL new... even though I learnt to knit say... about 10 years back???)... Wanted to make into a pillow though... I'll see what I can do with it... ==


JLPT 4

... I should say... I'm distracted... But hey! I'm reading 2 chapters ahead of what I've planned, k?...


Still coughing

This is going to take ages to recover.. I HATE having coughing fits.. Arghhh...
Related Posts Plugin for WordPress, Blogger...