Rhinestic's Knick Knacks
Showing posts with label baking. Show all posts

Monday, February 04, 2013

More CNY cookies!

Truth is I didn't plan to make pineapple tarts this year but someone in the household is craving for it and has been hinting me to bake him some..


My measuring spoons come in very handy this time round! It's a breeze to measure equal amounts of pineapple jam for each tart. But my hands still ended up sticky and gross when I rolled them into balls.. Haha..Perhaps I should invest in a small melon roller..

Tuesday, January 22, 2013

Piped Lemon Butter Cookies - Trial attempt

Tested a batch of lemon butter cookies today by using the recipe here by Cook & Be Merry but I halfed the amount and omitted the lemon extract.

The dough was soft enough to be piped, perhaps too soft...?


The baked cookies ended up looking a little too flat and they sort of lost the rosette shape. They were also a wee bit too fragile/crumbly, but putting the cookies into the refrigerator seemed to rectify that.


XB said the cookies were good but the butter seemed to be overpowering the lemony flavor (they are butter cookies, d'oh!) He liked the melt-in-the-mouth goodness though. Haha..

I would need to tweak the recipe before making a second batch. Hopefully, the cookies will turn out better and I will be posting the updated recipe!

Sunday, February 05, 2012

Kracie Happy Kitchen Soft Cookie - Tutorial

Photobucket

Gomen, gomen. Sorry for taking a little too long in coming up with this tutorial. Anyway, here goes.. This is what you will get after opening the box:

Photobucket

A nicely designed package. =) The bag says "Cookie Sheet" and you can put your finished cookies on the doily plate print. ( Yes, the instructions actually tells you to cut the bag neatly... =P )

You'll find the following contents in the bag:

Photobucket

A plastic tray, 5 packets of ingredients, 1 spatula and 2 mini piping bags.

Split the plastic tray into 3 different portions by cutting along the grooves:

Photobucket

The triangular portion is a mini measuring spoon for your water/milk; the tray with 2 deep containers is for mixing ingredients; the tray with 2 cute designs is the cookie molding.

Lets get familiar with the packets of ingredients:

Photobucket

The orange packet on the left contains plain cookie mixture while the chocolate packet on the right contains chocolate cookie mixture.

Photobucket

The pink packet on the left contains pink icing powder while the blue packet on the right contains blue icing powder.

Photobucket

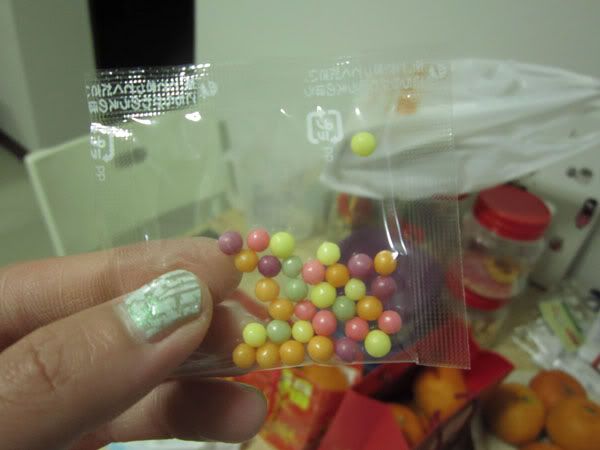
Sugar balls decoration! They are yummy. =P

You'll need water to make the cookie dough and icing, so do have that ready. According to the box, if you use milk to make the cookie dough, your cookies will turn out more delicious. And so, I prepared some milk too:

Photobucket

Now, lets prepare the plain cookie dough. Open the orange packet like so:

Photobucket

Using the tray with the 2 deep containers, pour 2/3 of the powder into the bigger container. Then, measure 1 mini cup of milk (or water) and pour that into the bigger container too:

Photobucket

Mix them with the spatula...

Photobucket

Until you have this consistency:

Photobucket

Pour in the rest of the powder from the orange packet and continue mixing:

Photobucket

At this stage, you might find it hard to mix and be tempted to add more water. Please DON'T do that. Just take your time and eventually you'll get a mini cookie dough like this:

Photobucket

Split the dough into 3 equal portions and roll each of them into a ball:

Photobucket

Repeat the steps for the chocolate cookie mixture:

Photobucket

You'll end up with 3 plain cookie dough balls and 3 chocolate dough balls.

Photobucket

Next, take a cookie dough ball and press it down on one of the shapes in the cookie molding. I used the spatula to press it down, but you can use your fingers too:

Photobucket

Repeat with another dough ball on the other shape and you'll get something like so:

Photobucket

Then, microwave them on "HIGH" for 4 to 5 minutes. Peel the cookies off the tray:

Photobucket

Repeat the same process for the rest of the dough balls and you'll get 6 cookies altogether:

Photobucket

The next part is decorating the cookies. First we need to making the icing cream. Open the pink packet:

Photobucket

Take the tray with the 2 deep containers again and pour the whole content into the smaller container. Measure 2 mini cups of water and pour that into the icing powder. Mix them well:

Photobucket

I forgot to take photo of this step but using the spatula, scoop out the cream and put it into 1 of the piping bags. Try to keep the cream in one corner of the bag. Once you have scooped out most of the cream, twist the top of the piping bag such that all of the cream is nicely packed in the corner. Take a scissors and snip a bit of the corner off such that the cream can flow out in a thin line. Start drawing on the cookies with it.

Once you're done, clean the tray and repeat with the blue icing powder. At the same time, decorate the cookies with the sugar balls provided. Have fun!

Photobucket

Tuesday, January 31, 2012

Kracie's Soft Cookie Making Kit

I won't deny I'm still a kid at heart. =P

Photobucket

This kit (by Kracie) basically teaches kids how to easily make soft cookies, using a microwave oven (which is very common in Japanese households), with just the ingredients provided in the kit and a little bit of water/milk. The kit also comes with icing ingredients to let you decorate the cookies.

And here're my cookies!

Photobucket

Okay, to tell you the truth, real cookies that I make from proper recipes taste much better. However, who can resist the fun of making mini cookies from this cute kit? Here's a youtube video which shows the process of making the mini cookies (this is also where I got to know about Kracie's products):


Kracie also has other kits like DIY gummy sweets, easy cupcakes etc etc. If you go to the channel by the above youtube member, you'll be able to see a number of how-to videos (in Japanese though) for Kracie products.

If you have the kit but are unsure about the instructions, I'll be posting my making process in my next post. Stay tuned!

Thursday, December 08, 2011

Baking tins - Fully lined.

Hope the title doesn't sound too "tongue-in-cheek" to the anonymous poster who asked a question regarding one of my O' Crafty Day tutorials on how to cut baking paper for a round baking tin.

In that tutorial, I showed my way of lining the bottom of the baking tin without the need to trace the round shape out. However, I did not touch on how to line the sides of the baking tin. And that's exactly what the anonymous poster wanted to know about.

As I usually just oil the sides of the baking tin and that's pretty much enough to help me get the cake out once it's baked and cooled down, there's not really a need for me to line the sides at all.

However, if you really prefer to line the whole tin, do not fret! Follow the instructions in my previous tutorial until you reach step 10. Instead of cutting on the folded line, cut about 1cm away from the line so you get a slightly larger round lining. When you put in this bottom lining, you'll have this extra 1cm perimeter which you can press flat against the side of the tin:

Photobucket

Next, cut a strip of baking paper that is about the same height as the baking tin and long enough to go round the sides of the tin once with a slight overlap. Place this strip along the insides of the tin, overlapping the 1cm perimeter of the bottom round lining and with the ends of the strip overlapping each other a little like so:

Photobucket

The side lining might tend to maneuver around, so try to keep it in place by holding the overlapped ends with your fingers while pouring your cake mixture or dab a little bit of vegetable oil or melted butter/margarine on some areas of the side of the tin so that the baking paper can sort of "adhere" and stay more in place.

And that's it, a fully lined baking tin!

Friday, January 28, 2011

Making pineapple tarts this weekend..

And I've just finished preparing the filling.

Photobucket

The process was looonngg... 3 hours worth of hard work and long wait to get...

...from this (of course the original state of the pineapple filling was the pineapple itself, but I was too busy cutting up and grating the 2 LARGE pineapples to take any photos):

Photobucket


To this:

Photobucket


And yes, I'm a little mad to do this when I should be sleeping. Hahahaaa..

Saturday, February 13, 2010

O' Crafty Day #11 - How to cut baking paper for a round baking tin

This is not exactly a craft, but a tip for cutting baking/greaseproof paper to fit in your round baking tin perfectly without the need to measure or trace (and dirtying the paper in the process).

1) Of course, you need some baking/greaseproof paper and your baking tin.

Photobucket


2) Cut out a squarish/rectangular piece of baking/greaseproof paper larger than the baking tin.

Photobucket


3) Fold the paper in half, with the opposite edges meeting each other. (The inside of the paper is where you'll be placing your unbaked goodies)

Photobucket


4) Fold the folded piece in half again, into quarters.

Photobucket


5) Fold along the pink line as shown below, making sure the folded edge meet with the other folded edge. (the paper will be divided into eighths)

Photobucket


6) Fold along the pink line so that side (A) meets up with side (B). (The paper will be divided into 16ths)

Photobucket


7) If you have done the previous steps correctly, you'll end up as follows.

Photobucket


8) Overturn your baking tin, and place the pointed tip of the folded paper at roughly the centre of the tin.

Photobucket


9) Bend the paper over the curved edge of the tin like so to make a rough fold:

Photobucket


10) The rough fold indicates where you should cut and you'll end up with this:

Photobucket


11) Open up the piece of paper, and voila! You'll get a piece of round shaped paper ready to be put into the baking tin.

Photobucket

Part 2 of making pineapple tarts

Made the dough using the recipe here. But after weighing the amount of filling I had (which was barely 200g), I most certainly had to half the amount of ingredients.

I also used champagne instead of vanilla essence.. Yes, you hear me right.. Champagne, as in the alcohol.. Well, another recipe suggests using brandy, and since I didn't have vanilla essence at hand, and my mum said that there's already an opened bottle of champagne in the refrigerator, and she claimed that using champagne is no different from using brandy......... Well, well, it's only about 1 teaspoon of alcohol.. No big deal..

Photobucket

For the baking part, I baked the tart bases first for about 10 minutes, before brushing on the egg yolk glaze and putting the pineapple filling in. After which, I baked for about another 8 minutes. This is a trick I learnt from another recipe which prevents the glaze from cracking and the pineapple filling from being too dry and hard.

I ended up with a few extra tart bases as I ran out of filling, and I'd already reduced the filling for the smaller tarts.. I guess 3 small pineapples would make just enough filling for this amount of tarts.. As for the extra tart bases, I filled them with jam.. Hahaha..

Photobucket

I strongly recommend the recipe that I linked here (for the tart bases) as well as the tricks that I've learnt. The tart bases are solid on the outside (which hold the shape quite well) but crumbly on the inside (almost melt-in-the-mouth!)... yum!

Photobucket

Photobucket
Maple leaf and flower... Autumn vs Spring..


*Update: I used top flour instead of plain flour... No idea if this gave the tart bases a nice crumbly feel without "disintegrating"...

Thursday, February 11, 2010

Part 1 of making pineapple tarts...

The pineapple tart filling....

Photobucket

Got the recipes (there are 4) from my colleague, but I had no idea how big a medium pineapple was... The recipe (for filling made from fresh pineapples) calls for 2 medium pineapples... The ones selling at NTUC look like they're more of a small than a medium...

My colleague said they managed to make about 80 pieces from the stated amount of ingredients in the recipe. But since I'm not going to make tons of tarts, I decided to reduce the ingredients by half, which means I needed 1 medium pineapple... But I bought 2 small ones to replace it...

I also used much less sugar than the ratio provided... (150 grams for 1 medium pineapple... I think I used less than 1/2 cup... maybe a quarter??) I guess Malaysian Honey Pineapples taste sweeter than other pineapples... And perhaps, raw cane sugar has a stronger taste, so a little goes a long way...?

Oh, I didn't reduce the 1 cinnamon stick by half though.. I used a small saucepan to cook the filling in 2 small batches. If I were to use only half a cinnamon stick, that would mean I had to do the almost insane act of splicing the half stick into quarters for each batch...

Actually, from the look of the end product, I don't think I can make 40 pieces of tarts out of it... Maybe 1 medium pineapple = 3 or 4 small pineapples after all..?

The filling is now resting in the refrigerator.. Need to buy plain flour later after work.. Stay tuned for part 2..
Related Posts Plugin for WordPress, Blogger...