Well, that's what it said on the Japanese packaging..
Bought the kit at Tokyu Hands during my short Tokyo trip 2 years back... Oh yes, I definitely heard Miss Procrastination's cries somewhere.
Anyhow, this was quite a simple project and it took a few hours to complete, even though I was feeling quite sick yesterday.
Showing posts with label Beading. Show all posts
Thursday, December 29, 2011
Friday, March 27, 2009
Royal Goth
Made a necklace to match my black-purplish dress (which I'll be wearing to a friend's wedding). You can see part of the dress in the photo.. Lol..
Saw the pendant kit at a bead shop, but was appalled by the price... I mean, I could buy the same materials at a fraction of the price of the kit, and I still have left-overs! Granted I had to figure out how to do the pendant myself... (Which was kinda fiddly but manageable)
But you know, the other great thing about not relying on kits is that you get to choose your own beads, and you can go wild on the basic design. The original kit I saw was this sweeter looking pendant (I remembered it was some pinkish swarovski crystals.. but not the pink I like) that was tied to a pink ribbon (acting as the necklace chain). Totally not the style for my dress.. But I love, love the use of the 4-holed metallic beads to make up the rectangular pendant!
So I used some dark-silver beads and deep purple swarovski beads instead. In place of the ribbon, I chose this double-stranded chain (very cool, very gothic) and a dark-silver bail to hook the pendant and chain together. Love the end result!
A closer look at the pendant...
Saturday, January 03, 2009
Tuesday, December 30, 2008
Stringing seed beads is tiring... LOL
Yeah, I'm now onto a new beading project. Bought another Miyuki necklace beading kit some time back.
Thought I'd make it to wear for my friend's wedding dinner, but alas, I bought this turquoise dress at Hongkong (Part of the dress can be seen in this post... =P) and decided to wear it to the dinner, and this "yet to be started" necklace was a total mismatch.. LOL..
But anyway, I finally started this project 2 days back, and completed the pendant part.

Now, I'm stuck at the arduous task of stringing tiny seed beads to make the necklace chain... LOL... Will be back with more pics once I've finished this necklace.. =P
Thought I'd make it to wear for my friend's wedding dinner, but alas, I bought this turquoise dress at Hongkong (Part of the dress can be seen in this post... =P) and decided to wear it to the dinner, and this "yet to be started" necklace was a total mismatch.. LOL..
But anyway, I finally started this project 2 days back, and completed the pendant part.

Now, I'm stuck at the arduous task of stringing tiny seed beads to make the necklace chain... LOL... Will be back with more pics once I've finished this necklace.. =P
Thursday, September 25, 2008
My version of the wire crochet necklace
I basically followed Karla Kam's version, but instead of having a single 3-stranded piece, I opted for a double 2-stranded version with one shorter than the other.
Wednesday, September 17, 2008
Crafty Tuesday - #1 Gothic Lolita Bracelet and Earring set
Sorry for the 1 day delay!!.. But anyway, for the very 1st post for Crafty Tuesday, I'll be sharing a tutorial on making a bracelet and earring set out of air-dry clay roses, ala gothic-lolita style.

Materials needed:
Makin's Clay - Black (You can experiment with other types of clay)
Perfect Pearl - Blue Smoke (You can experiment with other colors and brands of pigment powders)
Silver eyepins - I used 8
Silver jumprings - I used about 70
Silver headpins - I used 7
Silver Clasp - 1
Silver earring findings - 2
Instructions:

1. Grab and knead a small piece of the clay.
2. Take a tiny bit of this kneaded clay and roll it into a snake, about 2 cm long and 3 to 4 mm wide in diameter.
3. Flatten this snake.
4. Roll up this flatten piece like so. This will be the heart of the rose.

5. Take another 3 small piece of clay and form each of them into a tear shape. Each is about 7 to 8mm long.
6. Flatten these 3 pieces.
7. Take 1 flattened piece and wrap it round the rose's heart like so.
8. Push down the top edge a little to form the petal like so.

9. Take another flattened piece, and wrap it round the heart, slightly overlapping the 1st petal.
10. Do the same thing for the 3rd petal. This will slightly overlap the 2nd and 1st petals.

11. Take another 3 pieces of clay, slightly bigger than each piece in step 5 (Refer to picture 11 for a size comparison between each piece and the partial rose you've done so far), and form them into tear shapes.
12. Flatten these 3 pieces. These will form the outer petals of the rose.
13. Wrap one flattened piece around the rose. Try to place it between 2 inner petals like so.
14. Pinch the center of the edge of this outer petal like so.(You can shape this petal a little more to make it more realistic)

15 & 16. Do the same thing for the other 2 flattened pieces. You'll get a completed rose by step 16.
17. Use a scissors and trim off the back of the rose.
18. Flatten this trimmed back slightly. Now will be a good time to insert an eyepin through the back of this rose. (Refer to picture 20 to get an idea what I mean)

19. Use a paint brush and brush on Perfect Pearl for each rose. You could seal the powdered pigment in with a satin or matte sealer.
20. How the roses look with eyepins. I've made 6 small roses for the bracelet and 2 slightly bigger ones for the earrings. You could make more of the smaller roses if you have a bigger-sized wrist.

21. Connect 2 jump rings to one of the loops of a rose like so.
22. Take another 2 jump rings, and loop through the 2 jump rings you have connected to the rose earlier like so. (Ignore that weird filigree-looking thing that's attached to the back of the rose... It's a silly mistake I'd made. It should be an eye-pin in your case.)
23. Take 2 more jump rings; and connect them to the 2 jump rings you've attached in step 22 and to another rose like so.
24. Continue in this fashion until you have connected 5 roses or any number of roses that will give you a good fit (Ignore the 6th rose in this picture. I redid the bracelet, doing away with the filigree like backing.. Used eye-pins instead.)
I finish this bracelet by attaching a chain of jump rings to one end with some dangling beads (use a headpin to string the beads together for each dangle) and a rose. On the other end, I attached 2 jump rings through the same loop, another 2 jump rings through these 2 jump rings, and finally a clasp. (Wore this to work today.. LOL.. The Perfect Pearl really sparkle under sunlight!)

For the earrings, you take 1 earring finding and attach 2 jump rings through the loop of this finding. Then, take another 2 jump rings and attach them through the 2 previous jump rings. Next, attach the rose to these 2 jump rings. I then connect a chain of 4 jump rings with some dangling beads. Do exactly the same for the 2nd earring.
There you have it! A gothic-lolita bracelet and earring set!

Materials needed:
Makin's Clay - Black (You can experiment with other types of clay)
Perfect Pearl - Blue Smoke (You can experiment with other colors and brands of pigment powders)
Silver eyepins - I used 8
Silver jumprings - I used about 70
Silver headpins - I used 7
Silver Clasp - 1
Silver earring findings - 2
Instructions:

1. Grab and knead a small piece of the clay.
2. Take a tiny bit of this kneaded clay and roll it into a snake, about 2 cm long and 3 to 4 mm wide in diameter.
3. Flatten this snake.
4. Roll up this flatten piece like so. This will be the heart of the rose.

5. Take another 3 small piece of clay and form each of them into a tear shape. Each is about 7 to 8mm long.
6. Flatten these 3 pieces.
7. Take 1 flattened piece and wrap it round the rose's heart like so.
8. Push down the top edge a little to form the petal like so.

9. Take another flattened piece, and wrap it round the heart, slightly overlapping the 1st petal.
10. Do the same thing for the 3rd petal. This will slightly overlap the 2nd and 1st petals.

11. Take another 3 pieces of clay, slightly bigger than each piece in step 5 (Refer to picture 11 for a size comparison between each piece and the partial rose you've done so far), and form them into tear shapes.
12. Flatten these 3 pieces. These will form the outer petals of the rose.
13. Wrap one flattened piece around the rose. Try to place it between 2 inner petals like so.
14. Pinch the center of the edge of this outer petal like so.(You can shape this petal a little more to make it more realistic)

15 & 16. Do the same thing for the other 2 flattened pieces. You'll get a completed rose by step 16.
17. Use a scissors and trim off the back of the rose.
18. Flatten this trimmed back slightly. Now will be a good time to insert an eyepin through the back of this rose. (Refer to picture 20 to get an idea what I mean)

19. Use a paint brush and brush on Perfect Pearl for each rose. You could seal the powdered pigment in with a satin or matte sealer.
20. How the roses look with eyepins. I've made 6 small roses for the bracelet and 2 slightly bigger ones for the earrings. You could make more of the smaller roses if you have a bigger-sized wrist.

21. Connect 2 jump rings to one of the loops of a rose like so.
22. Take another 2 jump rings, and loop through the 2 jump rings you have connected to the rose earlier like so. (Ignore that weird filigree-looking thing that's attached to the back of the rose... It's a silly mistake I'd made. It should be an eye-pin in your case.)
23. Take 2 more jump rings; and connect them to the 2 jump rings you've attached in step 22 and to another rose like so.
24. Continue in this fashion until you have connected 5 roses or any number of roses that will give you a good fit (Ignore the 6th rose in this picture. I redid the bracelet, doing away with the filigree like backing.. Used eye-pins instead.)
I finish this bracelet by attaching a chain of jump rings to one end with some dangling beads (use a headpin to string the beads together for each dangle) and a rose. On the other end, I attached 2 jump rings through the same loop, another 2 jump rings through these 2 jump rings, and finally a clasp. (Wore this to work today.. LOL.. The Perfect Pearl really sparkle under sunlight!)
For the earrings, you take 1 earring finding and attach 2 jump rings through the loop of this finding. Then, take another 2 jump rings and attach them through the 2 previous jump rings. Next, attach the rose to these 2 jump rings. I then connect a chain of 4 jump rings with some dangling beads. Do exactly the same for the 2nd earring.
There you have it! A gothic-lolita bracelet and earring set!
Tags:
Beading
,
Clay
,
Crafty Tuesday
,
Tutorial
Saturday, September 06, 2008
Love's in the Air - Swarovski Necklace
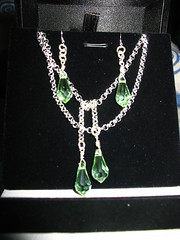
A romantic and vintage-looking piece for my dearest friend, Diana, as a wedding gift. My initial thought was to create a modern, edgy piece, but that idea kinda flopped...
Then, something clicked in my brain... Why not take what she likes and put them into the piece? Diana's a nature-lover and loves shades of green. She also has that gentle, classy and elegant look. A romantic vintage-style would look great on her!
With those ideas in mind, I've created ~Amour, Love's in the Air~. =) Totally made of Swarovski crystals, handcrafted resin clay roses, silver-colored filigree and sterling silver chains and findings. And of course, it's definitely made with lots of love. =P
Enjoy the photos! ^.^
As for why it's called Love's in the Air.... See those 2 butterflies? LOL..
Then, something clicked in my brain... Why not take what she likes and put them into the piece? Diana's a nature-lover and loves shades of green. She also has that gentle, classy and elegant look. A romantic vintage-style would look great on her!
With those ideas in mind, I've created ~Amour, Love's in the Air~. =) Totally made of Swarovski crystals, handcrafted resin clay roses, silver-colored filigree and sterling silver chains and findings. And of course, it's definitely made with lots of love. =P
Enjoy the photos! ^.^
As for why it's called Love's in the Air.... See those 2 butterflies? LOL..
Tuesday, July 22, 2008
Fast beading project: Bag Accessory
Did this within 3 hours with whatever beads and materials I have in my stash.. *wink* I made my own jump rings from the eye-pins (is this the correct term..?) too as I don't have any gold jump rings.. The top part is some gold metal ribbon. Design is my own (except for the beaded heart.. Followed a tutorial for that.)
A clearer look at the body chain:
How it looks on a bag:
It's not for me though.... Koff..
Tags:
Beading
Wednesday, July 09, 2008
A constructive night!
Did some knitting and beading yesterday night while watching my fave CSI and Bones!
Finally finished the back and left panel of the leafy lace cardigan, and am now on my right panel. =)
As you can see, I've modified the pattern quite a bit...
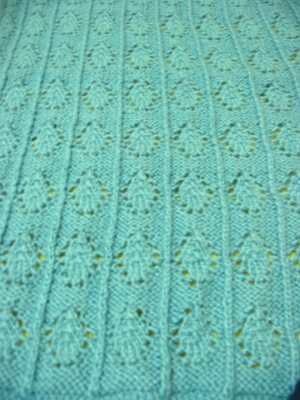
A close-up of the lace... The pieces need a serious blocking before I can seam them together!
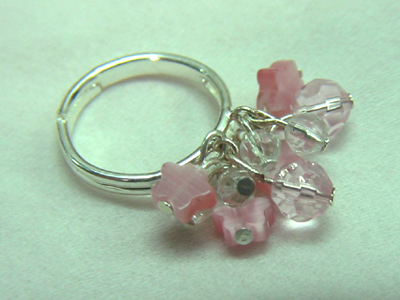
As for beading, I'd bought a simple ring kit from spotlight (for only 4 bucks!). The end result turned out kinda cute! ^.^ Will consider other pattern kits.. hahaha
A big close-up! (I've used 2 magnifying glasses for this.....)
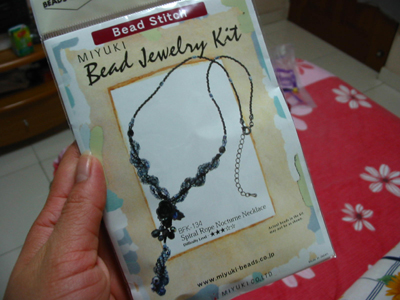
Oh, I'd bought another Miyuki necklace kit from Golden Dragon too.. Will be making 2 necklaces soon.. Shall see which match the jie3 mei4 dress better..
p.s. Just wanna add that the Beethovan's Pathetique 2nd Movement that's played on a harp for the wedding scene in Bones is so so so so beautiful!!.... T.T
Finally finished the back and left panel of the leafy lace cardigan, and am now on my right panel. =)
As you can see, I've modified the pattern quite a bit...
A close-up of the lace... The pieces need a serious blocking before I can seam them together!As for beading, I'd bought a simple ring kit from spotlight (for only 4 bucks!). The end result turned out kinda cute! ^.^ Will consider other pattern kits.. hahaha
A big close-up! (I've used 2 magnifying glasses for this.....)Oh, I'd bought another Miyuki necklace kit from Golden Dragon too.. Will be making 2 necklaces soon.. Shall see which match the jie3 mei4 dress better..
p.s. Just wanna add that the Beethovan's Pathetique 2nd Movement that's played on a harp for the wedding scene in Bones is so so so so beautiful!!.... T.T
Sunday, March 09, 2008
Necklace and 1/2 a Shawl...
Okay, pictures to my necklace as promised...
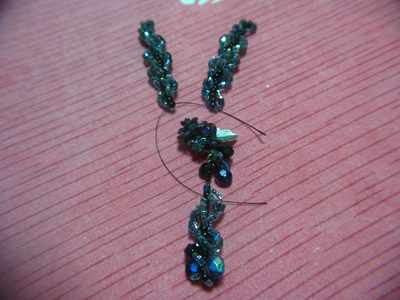
The Miyuki beading kit for a really cool-looking necklace
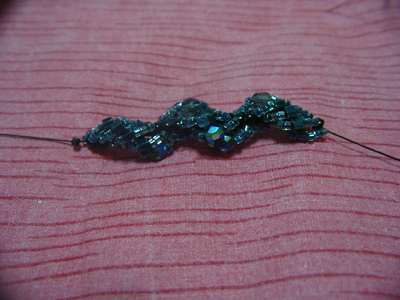
A beaded spiral component.
All beaded components done. Waiting to be strung together.
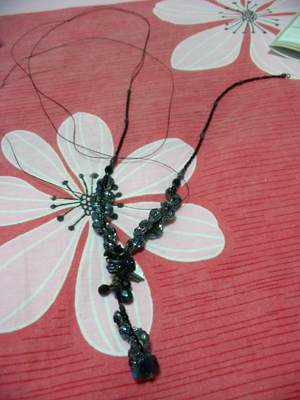
String them together... Unsuccessfully... I broke the crimper end..
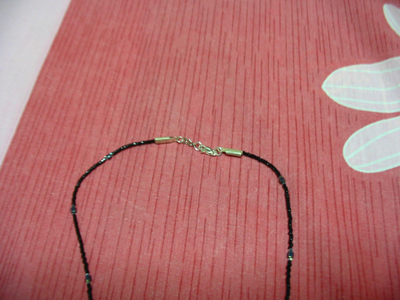
Replaced with the kinda ugly-looking clasp...
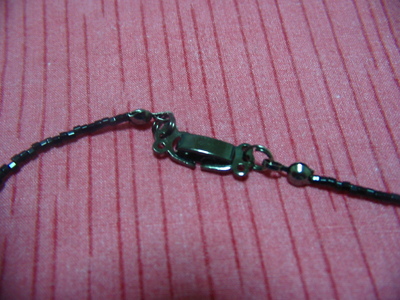
Finally got a clasp I really like!
Wearing it to my friend's wedding dinner...
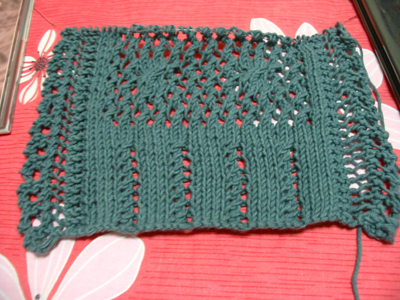
And talking about wedding dinner.. Didn't I say I had to finish knitting a shawl? No way can I finish the whole thing by yesterday!... Only managed to knit up to slightly more than half the shawl...
The eyelets on one of the sides (width-wise)... I yarned over wrongly on the purl side... They don't look like eyelets at all.. ==''' But it gave a pretty cool effect though.. But I think running ribbons through the eyelets will hide the mistake.. As for the 2 sides (length-wise), they don't look symmetrical, do they... That's because there are bind overs... I wouldn't want to keep re-attaching new yarn every four rows (at the ending columns), so I sort of improvised the "bind-over". Since I will be running ribbon through that column of eyelets, I think it's fine that the both sides don't look exactly the same. The main body consists of lattice lace and simple cables.
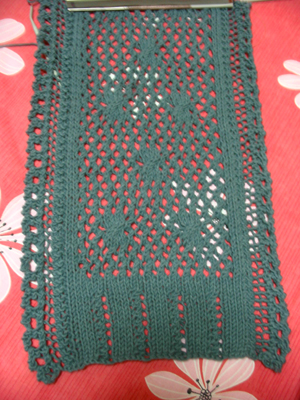
Slightly longer.. Can see how the cables are placed in the lattice lace.
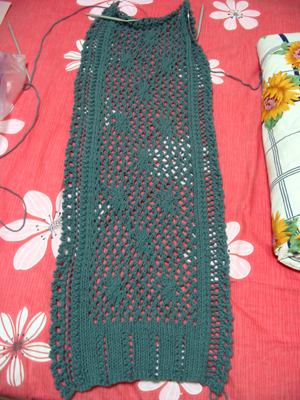
This is where I stop currently. Shall continue later. Will run ribbon through some of the eyelets and attach fringe to each side(width-wise) of the shawl.
The Miyuki beading kit for a really cool-looking necklace
A beaded spiral component.
All beaded components done. Waiting to be strung together.
String them together... Unsuccessfully... I broke the crimper end..
Replaced with the kinda ugly-looking clasp...
Finally got a clasp I really like!
Wearing it to my friend's wedding dinner...And talking about wedding dinner.. Didn't I say I had to finish knitting a shawl? No way can I finish the whole thing by yesterday!... Only managed to knit up to slightly more than half the shawl...
The eyelets on one of the sides (width-wise)... I yarned over wrongly on the purl side... They don't look like eyelets at all.. ==''' But it gave a pretty cool effect though.. But I think running ribbons through the eyelets will hide the mistake.. As for the 2 sides (length-wise), they don't look symmetrical, do they... That's because there are bind overs... I wouldn't want to keep re-attaching new yarn every four rows (at the ending columns), so I sort of improvised the "bind-over". Since I will be running ribbon through that column of eyelets, I think it's fine that the both sides don't look exactly the same. The main body consists of lattice lace and simple cables.
Slightly longer.. Can see how the cables are placed in the lattice lace.
This is where I stop currently. Shall continue later. Will run ribbon through some of the eyelets and attach fringe to each side(width-wise) of the shawl.
Tags:
Beading
,
Jewellery
,
Jewelry
,
Knit
,
Miyuki beads
Tuesday, March 04, 2008
Designing a shawl
And I've to do it and knit it by this Friday... In time for my friend's wedding dinner the day after. Tried looking for a shawl last Saturday but couldn't find any that I like.. Either that, or they're really expensive..
Have chosen an edging for the length and lattice lace/cable pattern for main body from a stitch dictionary, and the edging for the width from another stitch dictionary (Over the Edge?? Need to check both titles).. Most probably will incorporate a more fanciful yarn/ribbon as trimmings for the eyelets on the edgings.
Stay tuned for progress shots.
I've also finished making a necklace (for the dinner) last week. Quite a nightmare attaching the clasp to the necklace. Well, I managed to ruin the bronze-colored crimp ends that came with the D-I-Y necklace kit. =(
What happened was this: After stringing all the beads and the beaded components, and the 2nd crimp end, instead of stringing the stopper bead through one of the 2 strands of nylon string, i strung through both. After tying a few knots and thinking that the hole in the stopper wasn't big enough for the knots to pass through, I put some glue on the knots and cut off the remaining 2-stranded string.
I have a very bad habit of tugging strings/wires to "test how hardy" a necklace/bracelet/earring etc is... And as you might have guessed, the stopper bead came off the nylon string after I gave it a tug... >< Gripes.. There's no way I could put back the stopper bead the right way since I've cut the remaining string already...
So without much choice, I restrung the necklace, only to meet with another problem. The 1st crimp end that I've strung successfully on the initial side need to be undone. But it seemed that the crimp ends could only be closed over the stopper bead once. I was greeted with a slight "crack" when I used my pliers to pry it open... That's it. Ruined..
Thankfully, I've my own small collection of beads, trinkets and tools and such. Managed to find a packet of silver-plated crimp ends and a silver clasp. But after stringing for the 3rd time and attaching the crimp ends and clasp in place, I was kinda annoyed by the whole look of it... The casual look of the silver ends and clasp sort of destroyed the whole classy look of the necklace...
So my final straw... After unsuccessfully finding a shawl on Saturday, I went to Chinatown to find some bronze-colored crimp ends, double rings and another clasp. And boy, do I love the clasp to bits... It reminds me of the closings on those metallic analogue watches, where you click a flap to secure the watch over your wrist. On the 4th try, I finally got a necklace that I'm satisfied with. =D
Pictures to follow after I've transferred them to my comp and uploaded them.
p.s. Hope to finish Julienne's birthday shrug by this week too, so I can proceed to continue knitting Jeanne's...
Have chosen an edging for the length and lattice lace/cable pattern for main body from a stitch dictionary, and the edging for the width from another stitch dictionary (Over the Edge?? Need to check both titles).. Most probably will incorporate a more fanciful yarn/ribbon as trimmings for the eyelets on the edgings.
Stay tuned for progress shots.
I've also finished making a necklace (for the dinner) last week. Quite a nightmare attaching the clasp to the necklace. Well, I managed to ruin the bronze-colored crimp ends that came with the D-I-Y necklace kit. =(
What happened was this: After stringing all the beads and the beaded components, and the 2nd crimp end, instead of stringing the stopper bead through one of the 2 strands of nylon string, i strung through both. After tying a few knots and thinking that the hole in the stopper wasn't big enough for the knots to pass through, I put some glue on the knots and cut off the remaining 2-stranded string.
I have a very bad habit of tugging strings/wires to "test how hardy" a necklace/bracelet/earring etc is... And as you might have guessed, the stopper bead came off the nylon string after I gave it a tug... >< Gripes.. There's no way I could put back the stopper bead the right way since I've cut the remaining string already...
So without much choice, I restrung the necklace, only to meet with another problem. The 1st crimp end that I've strung successfully on the initial side need to be undone. But it seemed that the crimp ends could only be closed over the stopper bead once. I was greeted with a slight "crack" when I used my pliers to pry it open... That's it. Ruined..
Thankfully, I've my own small collection of beads, trinkets and tools and such. Managed to find a packet of silver-plated crimp ends and a silver clasp. But after stringing for the 3rd time and attaching the crimp ends and clasp in place, I was kinda annoyed by the whole look of it... The casual look of the silver ends and clasp sort of destroyed the whole classy look of the necklace...
So my final straw... After unsuccessfully finding a shawl on Saturday, I went to Chinatown to find some bronze-colored crimp ends, double rings and another clasp. And boy, do I love the clasp to bits... It reminds me of the closings on those metallic analogue watches, where you click a flap to secure the watch over your wrist. On the 4th try, I finally got a necklace that I'm satisfied with. =D
Pictures to follow after I've transferred them to my comp and uploaded them.
p.s. Hope to finish Julienne's birthday shrug by this week too, so I can proceed to continue knitting Jeanne's...
Monday, June 18, 2007
Hairband.. Headband...?
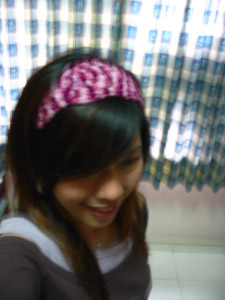
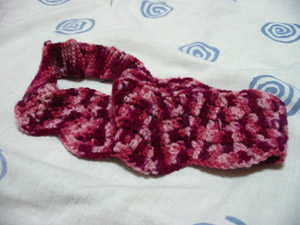
Tried a short crochet project last Saturday using the Honey Panta pattern. I suppose a panta is used similarly as a headband, just that you can use it to cover your ears during the cold winters??? Anyways, I made the "panta" narrower, since there's no winter in Singapore.. Looks more like a normal headband (or whatever u call it to pull the fringe back b4 you put on make-up).. Haha..
The headband..
A really blurry action shot..
Anywayz, I'm putting away the WIPs temporarily for these couple of days to complete someone's birthday gift. *wink*(Pics to be posted after I've given the gift..)
Here it is!
Jewellery set! =)
The headband..
A really blurry action shot..Anywayz, I'm putting away the WIPs temporarily for these couple of days to complete someone's birthday gift. *wink*
Here it is!
Jewellery set! =)
Tuesday, February 13, 2007
1 thing at a time....
Okay... Remember I said I've some photos to show? Lets start from SHE's qing gong... Held on 28th Jan, Sunday, at Junction 8.

As you can see... the photo is very blur... But.. I think you all can make out who's who.. Starting from the extreme left, our Dear Mr. DJ, Ding Zhiyong... then Hebe, Selina and Ella...


More blurry photos... I couldn't get a decent solo photo of Selina at all.. Then again, I got these solo photos by accident.. I wanted to snap a photo of them together...
Next, is the Hana Kimi xuan chuan on the next day... Look.. I don't have any decent photos at all... What I have here is a really pathetic video clip that I've taken.... which I think is so-so... At least can see them, okay?!??!
Ok.. Next up... My mum bought some Jap sweets from the Chinese New Year goodies exhibition at Ngee Ann City..

Guess what's inside! Nice-looking box, isn't it?

Tadaahh! Yummy-lookin' okashi!

A little closer look at the okashi... Very colorful, aren't they?

A close-up! Very, very, very delicious looking, aren't they?? Truth is.. Some of them are way too sweet for my liking.. hehe..
Right.... What's next.. Oh yah.. Some craftworks I've done... Since Chinese New Year is coming, I made a really huge looking ball-shaped lantern out of ang pows (or red packets in which we put $$$ in...)

It looks kinda small here... But it is actually pretty huge... Bigger than a soccer ball..

A clearer shot (for XZZ... That's the golden sticker... See it?)
I also did a beaded handphone critter... Doll, I mean.. The doll set actually came together with the bead book I bought... Din really fancy the white color as the skin tone... looked too ghostly for me..

Yah, that's the one which the pink arrow is pointing to... Ghostly...
Oh.. I also bought some japanese cookies from Daiso... They are more yummy than the japanese okashi that Mum bought.. Less sweet..

The cool paper bag is bought from Daiso too.. Going to send some of those candies to Julienne and Jeanne!
That's about all... Will have some more craftworks completed in the near future.. (I hope.. As what I've said in my previous post.. Had not been able to work too late into the nights coz of flu and what not.. Partly, it's due to the zzz-effect that the anti-itch pills have on me..)

As you can see... the photo is very blur... But.. I think you all can make out who's who.. Starting from the extreme left, our Dear Mr. DJ, Ding Zhiyong... then Hebe, Selina and Ella...


More blurry photos... I couldn't get a decent solo photo of Selina at all.. Then again, I got these solo photos by accident.. I wanted to snap a photo of them together...
Next, is the Hana Kimi xuan chuan on the next day... Look.. I don't have any decent photos at all... What I have here is a really pathetic video clip that I've taken.... which I think is so-so... At least can see them, okay?!??!
Ok.. Next up... My mum bought some Jap sweets from the Chinese New Year goodies exhibition at Ngee Ann City..
Guess what's inside! Nice-looking box, isn't it?

Tadaahh! Yummy-lookin' okashi!

A little closer look at the okashi... Very colorful, aren't they?

A close-up! Very, very, very delicious looking, aren't they?? Truth is.. Some of them are way too sweet for my liking.. hehe..
Right.... What's next.. Oh yah.. Some craftworks I've done... Since Chinese New Year is coming, I made a really huge looking ball-shaped lantern out of ang pows (or red packets in which we put $$$ in...)

It looks kinda small here... But it is actually pretty huge... Bigger than a soccer ball..

A clearer shot (for XZZ... That's the golden sticker... See it?)
I also did a beaded handphone critter... Doll, I mean.. The doll set actually came together with the bead book I bought... Din really fancy the white color as the skin tone... looked too ghostly for me..

Yah, that's the one which the pink arrow is pointing to... Ghostly...
Oh.. I also bought some japanese cookies from Daiso... They are more yummy than the japanese okashi that Mum bought.. Less sweet..

The cool paper bag is bought from Daiso too.. Going to send some of those candies to Julienne and Jeanne!
That's about all... Will have some more craftworks completed in the near future.. (I hope.. As what I've said in my previous post.. Had not been able to work too late into the nights coz of flu and what not.. Partly, it's due to the zzz-effect that the anti-itch pills have on me..)
Tags:
Beading
,
Food
,
Paper Craft
,
SHE Stuff
Subscribe to:
Posts
(
Atom
)