Rhinestic's Knick Knacks
Showing posts with label Sewing. Show all posts

Tuesday, September 15, 2015

Kimono for the Pooch


Sewn this way back in early August just in time for my sis-in-law's wedding. The poochy princess needed to have something nice to wear to the wedding too, right?

The model pose..

Sewing pattern: Milla Milla Kimono pattern for dogs
Fabric: Double gauze cotton for main body, quilting cotton for han-eri and obi
Notions: Velcro, thin ribbon
Notes: Added a faux han-eri and tweaked the way the bottom panel is attached to the top bodice for a nicer finish.

The overlapped 'front'

Finished 'inside'

Tuesday, July 21, 2015

Clothing for the Pooch in the House

I have just sent Akiko for her first full grooming, and it's a tad shocking to see her missing that coat of voluminous (but tangled at the wrong places) fur... She's now a scrawny-looking little Bambi...


Coincidentally, I chanced upon Milla Milla while searching for youtube videos on sewing yukata for dogs. It's a Japan-based dog wear patterns shop and they have free patterns for the basic tank and hoodie (It's also a good way to test which size fits your dog better before purchasing any of their patterns).

Between SS and S sizes, I couldn't tell which would fit Akiko better so I made a muslin out of the smaller size first.


As you can see, I did the muslin before she had her fur chopped off. Despite the ridiculously poofy fur she had, the SS size fitted her pretty well.

With that, I made another with a hoodie.


She looks pretty chic and sporty, ready for the hot months ahead!

And yes, I did purchase their Yukata pattern for SS-sized dogs.. I still need to study more dog wear patterns before I can draft any on my own..

Sunday, October 05, 2014

Honey Dahlia Autumn Dress (Selfish Sewing Week Fall 2014, a week late)

Besides the sewing done for the shop, craft markets and clients, it's been quite a while since the last time I've sewn a piece of clothing for myself.

I had been wanting to design and sew something more appropriate for Singapore weather, but was too busy with another project (stay tuned for this next week in November! Oops, I saw the date wrongly.. My bad!) to start on it.  Also, I got the dates for the Selfish Sewing Week mixed up! I thought it started this week Monday! By the time I realized it, it was already the last day of this online community event.

But hey, that can't stop me from participating in it, albeit 1 week late... To keep to the theme of Fall, I decided to self-draft and sew an autumn dress instead. Perfect for me to wear to my Tokyo trip next week!


The fabric that I used here was actually intended for another drafting project I had in mind. But I thought the material (a stretchy cotton blend fabric, I believe) was suitable for the transitional season (weather is just getting a little chilly there, still on the warm side) and the mustardy honey color was perfect for fall.

I drafted the bodice based on a top I have, but I altered the neckline and length. The skirt with pockets and mini curved side slits was drafted from scratch. Before sewing the pieces, I screen-printed my dahlia design onto part of the bodice and 1 of the sleeves.


The bodice was lined and I added buttons and button holes to the slits so that they can close up and create a slight balloon shape silhouette. The buttons are a variation to my handmade "Beady-eyed" acrylic resin buttons which can be found on my Etsy shop.


Handmade this necklace too!

Pattern: Self-drafted
Fabric: Stretch cotton blend, screen-printed with my own dahlia design
Notions: My handmade acrylic resin buttons (variation of my Beady-eyed buttons)

Thursday, July 31, 2014

Crafting Update 1: Washi Tape Mini Clutch Wristlets ( + a little rambling )

Slightly more than 3 weeks back, I was going through my Facebook feed and chanced upon a post by MT Masking Tape Singapore, calling for fans to join the "Handmade with MT" campaign. Participants were required to create something using only MT tapes for decoration and shortlisted entries would then be displayed and sold at the Launch of the new MT tapes selection. (In case you're wondering, MT tape is the very famous and original brand for washi tapes.)

Thinking it would be a fun experience, I decided to participate, while at the same time, egging on Ailyn from Tat'sWorthy@such to take up the challenge too, which she did.

Both Ailyn and I were of this "since there would be a shortlist, perhaps it's better to up the game instead of purchasing pre-made blank products and taping them" mentality. We went maker-mode and decided to go the "made-from-scratch" route. Ailyn is a new scrapbooker, and she had the brillant idea of making scrapbooking decorations from unexpected supplies and, of course, MT tapes.

As for me, I went through a few possibilities in my mind. I was thinking resin accessories but for some reason, my knitting needle pockets (which I made entirely out of MT tapes) + the act of sewing kept flashing in my head. And then, I suddenly remembered I had this almost-forgotten paper laminate kit which was chucked away in a corner of my sewing studio. *My light bulb lit*

In case you're wondering why a paper laminate kit was sitting in my SEWING studio, that kit was meant for creating sew-able waterproof paper fabrics. With the possibility of creating my very own MT fabrics, I eventually settled on making some kind of MT pouches. I wasn't too sure if MT tapes would work with the paper laminate kit, so I devised a technique of taping the tapes onto a very thin sheet of white paper and did a test swatch...


It seemed to work! I also wanted to make sure the paper fabric was able to withstand a reasonable amount of weight, so I sewed a sample purse (with lining, zipper and all... I must say the paper fabric is not the most pleasant material to sew with...) and brought it out everyday before I was cutting too close to the deadline (we only had 2 weeks to work with)...

Excuse my chipping nail polish and the mismatched strap..

Seemed sturdy enough! (In fact, I am still using it!) And the interesting texture really gave the purse a lot of character! It almost looked like some kind of crumpled leather.

And so, I proceeded to plan the actual bag design. Since the focus was on MT tapes, I decided to go simple on the shape of the bag and go fancy on the fabric designs. I finally came up with the mini clutch wristlet design which is a rectangular pouch, half the size of a normal clutch, and includes a handmade removable strap.

The concept behind this size is to allow the user to either use it as a stand-alone wristlet or as a supplementary pouch which can be put into a bigger bag. I wanted each wristlet to stand on its own, so each of them has a unique fabric design. As with all the other bags I made, the wristlets are fully lined. I also handmade the removable straps from strips of suede.

I managed to make 3 wristlets before the submission deadline, having the intention to make a few more if I got shortlisted. (Ailyn was also thinking of making more only if she's shortlisted) Problem was we were not told when the results would be out and they mentioned they would only message us through FB if we were shortlisted..

A couple of days on and 4 more days (2 if weekends are excluded) to the new MT tapes launch, there was still no news. Ailyn and I were pretty much giving up hope on getting shortlisted, while thinking at the same time that the standard must be pretty high. Then, that very night on the second day, Ailyn told me she was shortlisted! That prompted me to check my FB account... Lo and behold! I was shortlisted too! Yay? We only had 3 days to continue making what we could...

2 more wristlets were all I could manage but I went nuts with the fabric design on them. I guess I was on an adrenalin high. I was crazily punching out hexagons and cutting out parallelograms by hand, and aligning and pasting them one by one on my pieces of paper. Gosh...


And so, I made a total of 5 wristlets (check my next post for a clearer shot of each one!) and brought them down to the event.. Perhaps we should have lowered our expectation a little.. Ailyn and I weren't too impressed by the very small "Handmade with MT" section... There were only 4 types of items, including ours. And looking at the decor-ed notebooks and decor-ed plastic card holders, both of us were wondering why we even put in that much effort... (They later added a decorated stool.. But it's still straight taping...)

Mini Clutch Wristlets, decor-ed stool, scrapbooking goodies, decor-ed card holder, decor-ed notebooks (The rest are MT products), photo by MT SG

Perhaps what is worse is that up till now, there doesn't seem to be much (or any) sales. (I know my wristlets have yet to have any sales.. which is, I won't lie, disappointing...) Not sure if it's the lack of advertising on MT SG's part, or the people here are still not adept to buying handmade items.. We still have until end of this week, so fingers crossed...?

Monday, May 19, 2014

A Belated Handmade Gift for Mum

I did get my mum 2 Clinique lipsticks. However, after reading an article about the origin of Mother's day, I decided to make something for her, albeit belated. 

Had a few ideas in my head but I went with screenprinting my own fabric and making an all-purpose pouch for her.


If you have been following my blog for the past year, you'll probably recognize the print that I had designed for my textile art class. This final almost burgundy-ish color of the screenprint paint was mixed using a few different speedball colors. I should have added some blues to make it a complete burgundy! I also added a strap and charm to finish the piece.

Recently, I had all my shop and branding logos made into rubber stamps professionally. I decided to test my branding logo on the bag with some Tsukineko fabric ink.


Quite nice. :) With all the stamps made, I could finally start making my proper name cards as well as the bags which I'll be selling. Yay!

Anyway, I'm so excited for this Saturday! There'll be a yarn bombing session in Singapore (Finally! And it's legal!) and I'll be participating!

Monday, May 05, 2014

Time for some garment sewing..!?

It's been quite a while since I've last sewn a garment and I thought it would be a good idea to reboot my garment sewing mojo by participating in the upcoming/ongoing Sewing Indie Month!

Sewing Indie Month

I'm not entirely sure which category/ies I am going to enter but it'll most probably be "An Indie Love Affair" and/or "Pattern Hacking" since hacking patterns and combining different ones are mostly what I do be it sewing or knitting.. Haha.. (I really should start putting the things I learnt in my fashion design course into good use and venturing into drafting my own patterns though.. )

Gotta sift through all the different patterns and tutorials from the listed indie pattern designers and start making plans!

Friday, November 15, 2013

Chris Signature Skirt


Pattern: Self-drafted
Fabric: Cotton duck, cotton lawn
Notions: Invisible zipper, hook & eye

And so, my skirt was completed and I wore it to class on Tuesday. My problem now is the black lining which bled a little in the washing, and now there are gray spots on my base skirt. XB said it's totally not obvious and he wouldn't even have noticed if I hadn't said it. Plus some of the spots were hidden by the pleats. BUT. I just couldn't reconcile with the fact that there're color bleeds on my skirt. Stubborn much?

To think I'll be wearing it again later today for an event. Sigh.

Thursday, October 24, 2013

Toile Making: Chris Signature Skirt

Housework and the exhibition cross-stitch project (Oh gosh! I think I'm kinda running behind time!) aside, I have been busy drafting and sewing the toile of my skirt for my pattern construction/sewing classes.


My skirt is fundamentally a pleated panel wrapping round my slight A-line skirt piece. Instead of a waist band, we were taught to use facings instead.

Looks simple enough? Well, the pleated panel was a little tedious to make since the unfolded piece was really long and I had to combine my calico fabric 3 times coz the weft wasn't wide enough. Then I had to go through the same process to cut out my lining, and pinning the pleats together like mad so that they won't move. Otherwise, it's pretty straight-forward.

Ironically, the A-line skirt portion was the one giving me a bit of a headache. In our drafting lesson, we used the "closing dart" method to draft our A-line skirt. Meaning, the final skirt won't have darts because it's already taken care off by the redrawn curvature of the waist line and the side seams on the hips. But that posed quite a problem for me, since I have my zipper at the side seam. Increased curvature + side zipper = unsightly puckers. 

Unfinished pleated panel + A-line skirt version 1.0

Snipping the curved seam allowance might have solved this problem but I like my side seams neat so I ended up drafting the traditional A-line skirt, which includes the darts with less curvature on the sides. And indeed, this version sat much better on my waist.

However, after trying the pleated panel + A-line skirt version 1.1 combo, I figured the hem of the skirt needed to be a little longer and the A-line less flared. And so, I had to go back to my drafting paper and draft out a 3rd version. Which you are seeing in the first photo. 

My final pattern pieces

I thought I should name the skirt since this was my first made-from-scratch fitted skirt of my own design. Chris Signature Skirt it shall be! =) 

Monday, May 06, 2013

Pouch + Kimono Cropped Top

Last saturday, I attended the 2nd part of the shibori dyeing workshop. This session was fully on hand-sewing and all of us managed to complete our very own pouch.


And so, I was left with 6 of the dyed pieces. I had thought of making a tank top out of them but after playing around with the pieces, I figured there wasn't enough fabric. (Well, on hindsight, with some extra fabric from the stash + some creative piecing, there could be enough..)

In the end, I decided to choose 4 from the 6 pieces and display them in their full glory. And I thought the best way to do so would be creating a Kimono-ish top, 1 dyed piece for each panel. And hence, the birth of my Kimono cropped top.

The front: floral + damask

The back: Triangles + Peranakan (The overhanging piece is from my striped piece)

I'm not that thrilled about the white lace trim. It would have been more lovely if it's dark blue. But I guess all I need now is a nice white dress to pair this top with... My next sewing project?

As for my 2 leftover dyed pieces, I guess I will sew another pouch out of them.

Saturday, October 27, 2012

Floral Hipster: 1 meter Liberty Blouse

Action shots!

Pretty large glasses (checked), floral blouse (checked), skinnies (almost there), quirky pin (checked)

This cactus is thiiiiis big!

Something random...


Sewing Notes
Material: Lightweight Liberty cotton lawn, lightweight interfacing
Notions: Beige bias binding, blue triangular buttons
Pattern: New Look 6407 View E

Tuesday, October 16, 2012

WIP: 1 metre Liberty Blouse - Almost done!


All it needs is some final touches on the collar. =) I must think of a way to use up the odd scraps of the Liberty fabric... It ain't cheap!

Monday, October 01, 2012

WIP: The 1 Metre Blouse

And so my dilemma finally came to a resolution. I badly needed more blouses for work and since I've already had this project planned eons ago, I got my butt off and grabbed the already cut pattern (if you need a refresher, I tested the pattern a while ago) and my 1 metre Liberty fabric.

I had initially intended to alter the pattern a little right after making the test piece, but after wearing it almost every week to work, I found that I like the fit. That means I could trace and cut right away! What a blessing!

Liberty fabric + triangular buttons = Love!

I've finished cutting all the pieces, serged the edges that need to be serged before sewing and basted some of the darts. Next will be the assembling and all the rest of the sewing!

Thursday, September 06, 2012

Fat Quarter Ideas #1 - Waterproof Square Makeup Pouch

Photobucket

Hi all, so sorry for taking so long to come up with this tutorial. It was cloudy the whole of Monday last week and I couldn't snap any photos properly and of course having a day job on other days means I didn't have the chance to start creating this tutorial until the day before which was my day off again and the sun was smiling and photos turned out fine.

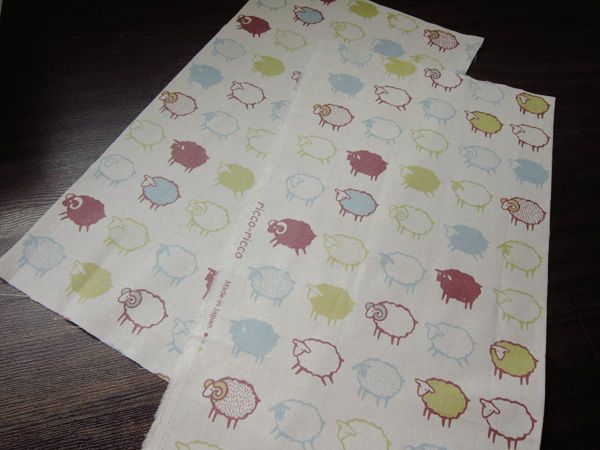
Anyways, let's move on. As you can tell from my post title, this pouch is made from just a piece of fat quarter. And you'll be surprised at how much this pouch can contain despite the "lack of fabric". =P I've opted to iron the water-proof vinyl onto the lining just so the pouch wouldn't look messy on the outside (wet patch anyone?) in case there're spillages in the pouch when things topple within my luggage.

The pouch for this tutorial is a variation of the pouch I made in this post. In that post, I've used an external zipper instead of a normal zipper. I will put up a rough description of how I did the previous pouch at the end of this tutorial (which is in fact simpler than this version).

Materials and tools needed:

Photobucket

1) Heavy fabric, fat quarter
2) Heat 'n' Bond Clear Iron-On vinyl, enough to cover 1/2 the size of a fat quarter.
3) Zipper, at least 10 inches long
4) Matching thread
5) Fabric scissors
6) Pins
7) Sewing machine
8) Bias binding if you don't have a serger
9) Iron and ironing board


Directions

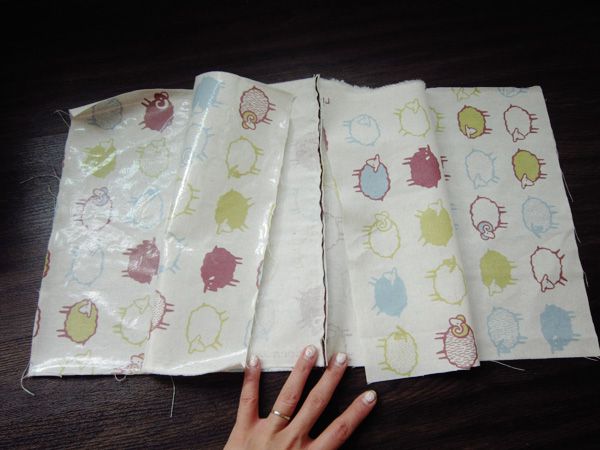
1) Cut your fabric in half. Ensure that the orientation of your fabric is correct. (Prints should run parallel to the shorter edge of the fabric)

Photobucket\


2) Cut each half into half again (refer to photo). For each pair of halves, determine which will be the lining, and which will be the main outer fabric.

Photobucket


3) Cut out 2 pieces of iron-on vinyl that have the same dimension of the lining pieces. Follow the instructions for the iron-on vinyl and cover the lining with the vinyl.

Photobucket


4) Layer 1 lining piece (face up), zipper (face up) and 1 main outer piece (face down) in the following manner, aligning the top and left edges:

Photobucket

(I offset the left edge for the purpose of showing how you should layer the pieces. If your zipper is longer,  align the zipper pull end of the closed zipper with the left side. The other end of the zipper will protrude out from the right side.)


5) Pin the 3 pieces together at the top.

Photobucket


6) Sew the 3 pieces together at the pinned edge. I've used a 1/4 inch seam allowance. Turn the pieces right side out.

Photobucket
(I will post another tutorial on how to sew a zipper without a zipper foot for this type of projects)


7) Now, we need to sew the other side of the pouch. Layer the 2nd lining piece (facing up), piece from step (6) (right side facing up) and the 2nd outer piece (facing down), ensuring that the top edges and the side edges line up.

Photobucket


8) Pin the pieces together at the top edge, and sew that with a 1/4 inch seam allowance. You will get something like the following upon flipping the sewn piece right side out:

Photobucket


9) Flip the fabric pieces such that the wrong right* sides of the lining are facing each other and the wrong right* sides of the main outer pieces are facing each other like so:

Photobucket
*Edit: Not wrong sides! I meant the right sides! ==


10) Pin the linings together at the longer edge. Do the same for the main outer pieces. (Refer to the dotted lines in the photo below) Sew the pinned edges with a 1/2 inch seam allowance. (These seams will end up as the bottom seams of the pouch)

Photobucket


11) Trim the seam allowances down to 1/4 inch. You may use pinking shears to prevent fraying.

Photobucket


12) Flip the piece inside out such that the lining pieces are outside, and the main outer pieces are inside (refer to photo)

Photobucket


13) Line up the bottom seam of the lining pieces and the bottom seam of the main fabric. Pin them in place (make sure to pin from the lining side).

Photobucket
Pardon my dry skin


14) Make sure the zipper is unzipped. Align the zipper with the bottom seam and pin them in place (make sure the lining piece is still on the outside, and the main outer fabric on the inside).

Photobucket


15) This next step might be a bit confusing but hopefully the video clip at the end of this step will clear some doubts.

First, press down/iron the piece so that you get visible creases on the folds that form naturally from the pinnings in step 14.

Orientate the piece such that one side of the unsewn edges is facing you like so.

Photobucket


Unfold one side like so:

Photobucket


Match up the crease (side) with the zipper and the bottom seam like so:

Photobucket

Press firmly on the newly formed folds so that you will have a flat piece that is lying perpendicular to the rest of the pouch.

Fold this flat piece into half like so:

Photobucket


The following video clip shows a live demo of how to do the same for the portion on the other side of the zipper.


16) Once you have a flattened piece, pin the unsewn edges. If you have a serger, you can serge these edges. If not, sew the edges with a 1/2 inch seam allowance and trim them down 1/4 inch. Hide the raw edges with the bias binding.

Photobucket
You can tell I've trouble with serging through the metal zipper. Should have gone with the sewing machine. =P


17) Flip the pouch right side out through the zipper opening and adjust the folds until you get a nice squarish pouch.

Photobucket


Variation with an external zipper (works best with a serger)

If you are interested in making a version similar to the one I made for my Russia trip, instead of cutting each half into two as per step 2, fold each half into 2 and press. Unfold. Cut out 2 vinyl pieces, and iron each piece to the top 1/2 of each half like so:

Shiny side is vinyl-covered

The vinyl-covered sides will be the lining while the non-covered sides will be the outer fabric. Fold  the halves back into 2 again. Place one of the folded pieces with the outer fabric facing up. Layer the other folded piece, with the lining facing up, on top of the first piece, making sure the folded edges line up. Serge/Sew the edges opposite the folded edges together.


After serging the edges, attach the external zipper to the main outer pieces like so:


If your zipper is longer than the fabric like mine, trim off the excess and secure the ends of with some stitches:


Unzip the zipper if it's not and flip the pouch wrong side out (vinyl-covered lining on the outside) like so:


From here, you can follow step 14 and onwards to finish the pouch.
Related Posts Plugin for WordPress, Blogger...